Southern gardening

What’s Eating My Milkweed? Aphids, Milkweed Bugs, and Caterpillars.

Environment-minded gardeners often grow milkweeds in our southern gardens. Popular choices include the common orange Butterfly Weed (Asclepias tuberosa), and the taller, dusty pink Swamp Milkweed (Asclepias incarnata). My personal favorite, mostly due to its unusual appearance, is Fuzzy Balls Milkweed (Gomphocarpus physocarpus). If you need a refresher on this last one, refer to this past blog: https://www.marysnoddy.com/blog/2024/7/30/hummingbirds-fight-over-this-plant.

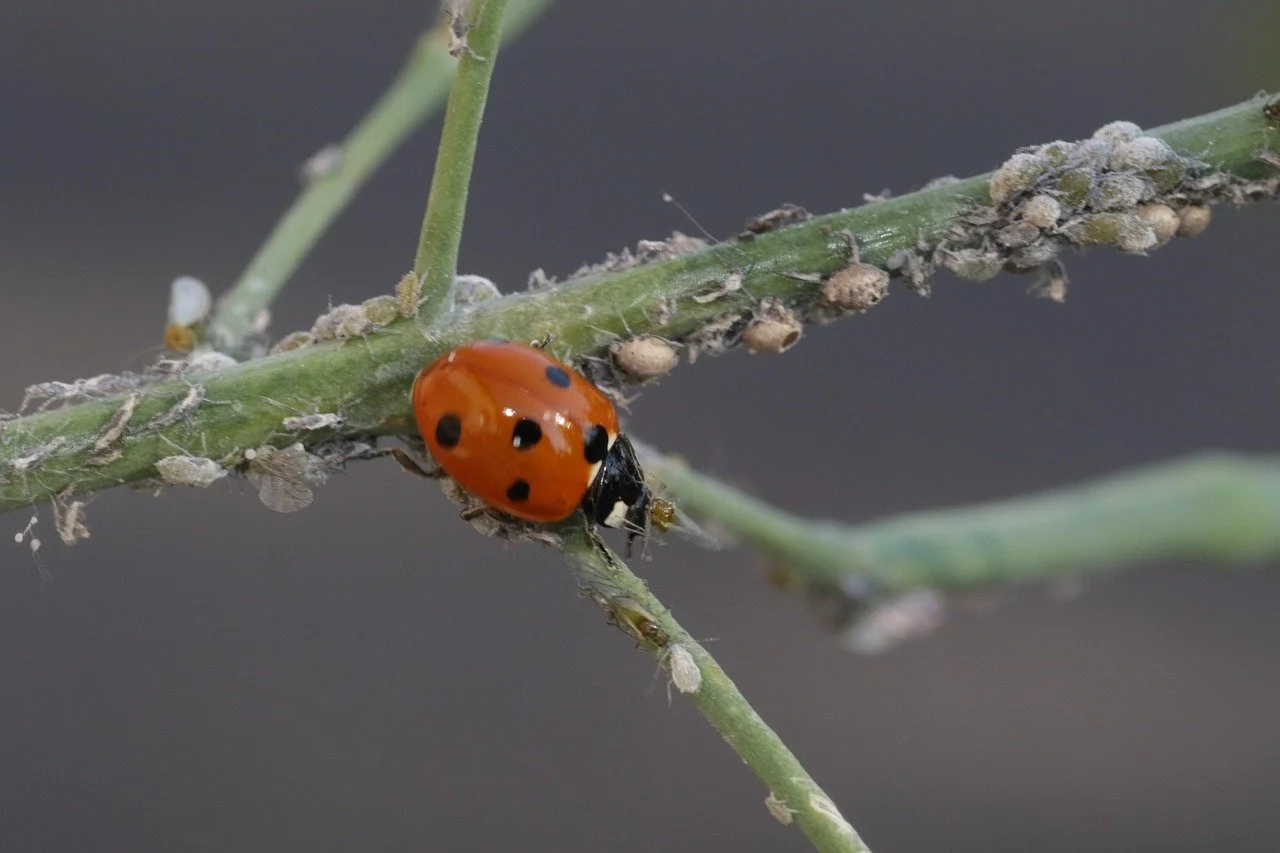
These plants are different in appearance, but they all support butterflies in either their caterpillar or adult stages. But milkweeds share a less pleasant characteristic. They attract numerous aphids. If you grow milkweeds, you almost certainly will have aphids. Aphids rarely cause lasting damage to plants but heavy infestations cause the affected leaves--usually the most tender ones held at the topmost and terminal growth of the stems–to shrivel, dry, and drop. The standard prescription for removal is to dislodge them with a stream of water from a garden hose. Easy prescription to understand, but I find it lacking in effectiveness. I think one would almost need a fire hose to make them loosen their grip. Frequently, my plants sustained more damage from the repeated use of a sharp stream than from the insects themselves. Now, I find a gentle water stream combined with finger action is most effective. Wear nitrile gloves to avoid staining fingertips orange when applying this removal method. I use this method early in the season, but by midseason the insects are numerous and I stop the manual removal and allow lady beetle (“ladybug”) larvae to take over the fight. Evidently, aphids are a tasty meal to these insects so I allow Mother Nature’s battlefield to unfold in my flowerbeds without my interference.
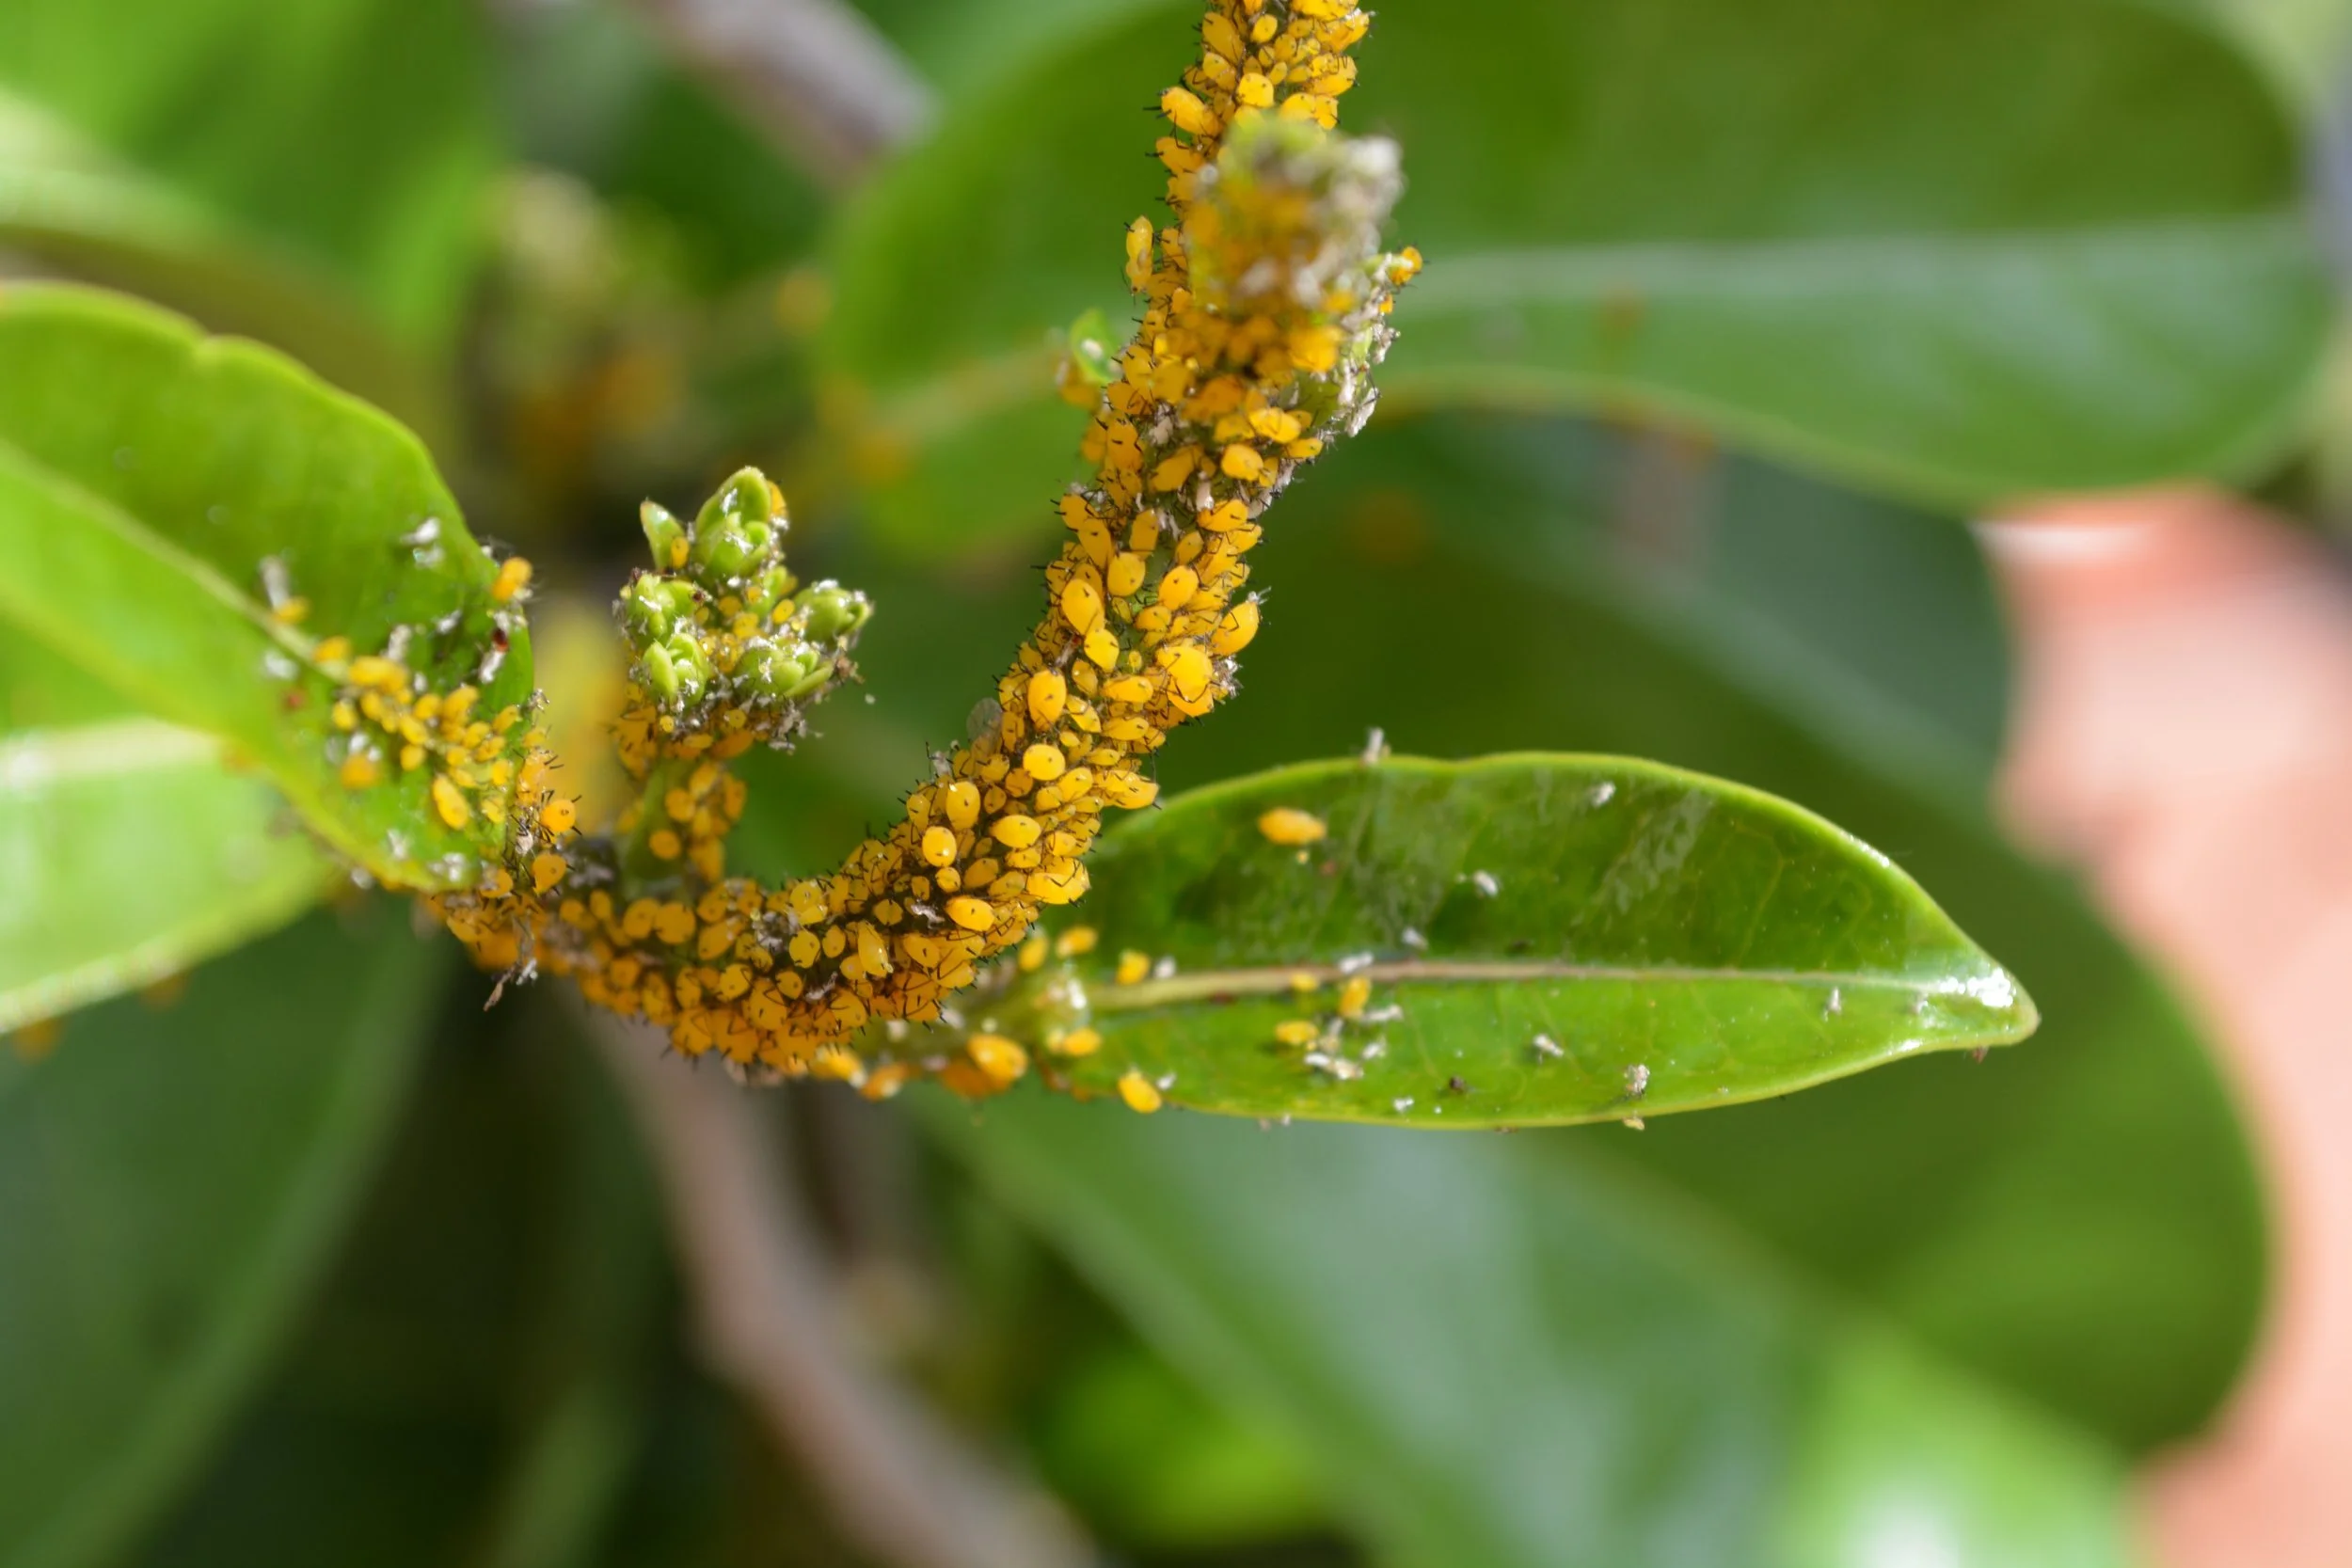
Orange insects clustered along stem

Adult lady beetle enjoying a meal of aphids

Last year, the aphids were joined by a new invader, milkweed bugs (Oncopeltus fasciatus). These are easy to spot due to their orange and black color combination in both nymph and adult stage. Later, tussock moth caterpillars joined the party. Tussock moth caterpillars may defoliate milkweed plants, but established plants generally recover. They do not bite or sting, but their hairs can cause skin irritation, so avoid handling them with bare hands
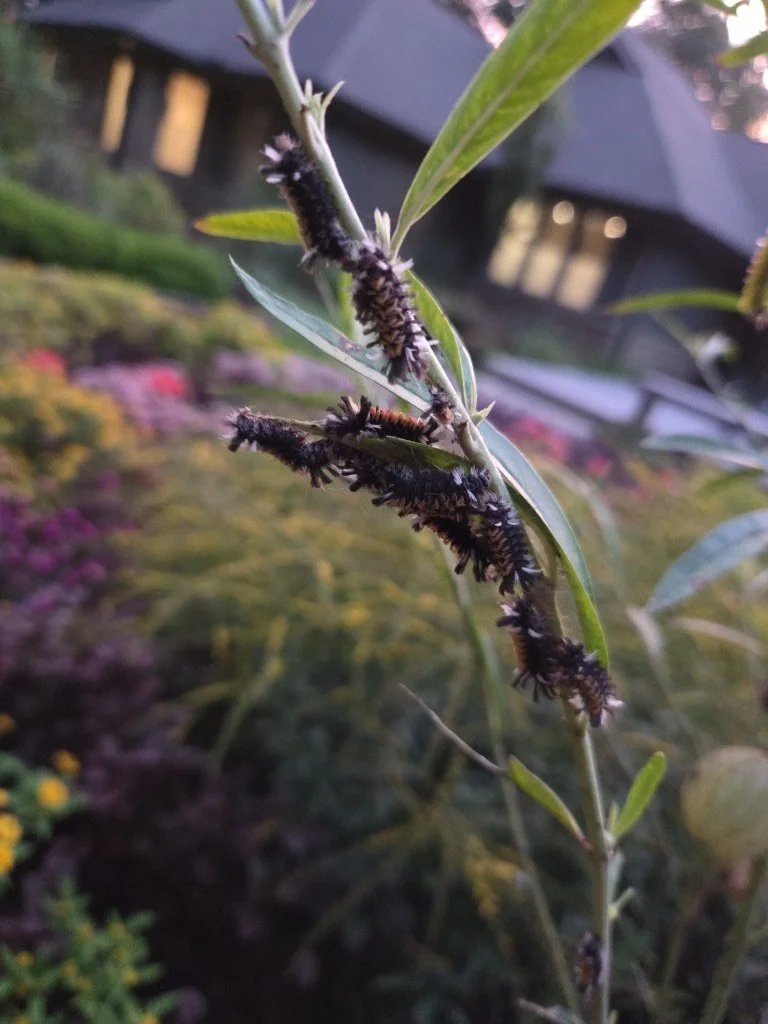
Tussock moth caterprillars have eaten almost all the leaves on this Fuzzy Balls Milkweed.

Milkweed bugs primarily feed on the developing seeds produced by their host plant. My orange Butterfly Weed is perennial and returns reliably year after year, but the Fuzzy Balls Milkweeds are more subject to cold damage. I always retain a few “just in case” seeds as insurance in case a harsh winter means mine do not return. If you save seeds from year to year so that you can start replacements in the following season, you will notice a much-decreased germination rate if the plant has hosted milkweed bugs. I counter this by harvesting a seedpod just as soon as the seeds turn dark but before the pod has split and the seeds start drifting away on their downy tails. I wrap the seedpod in a damp paper towel, place it in a sealed plastic bag, and store it in my freezer a week to ensure any insects are no longer a threat. I remove the bag from the freezer and store it in a cool, dry place along with my other seeds.
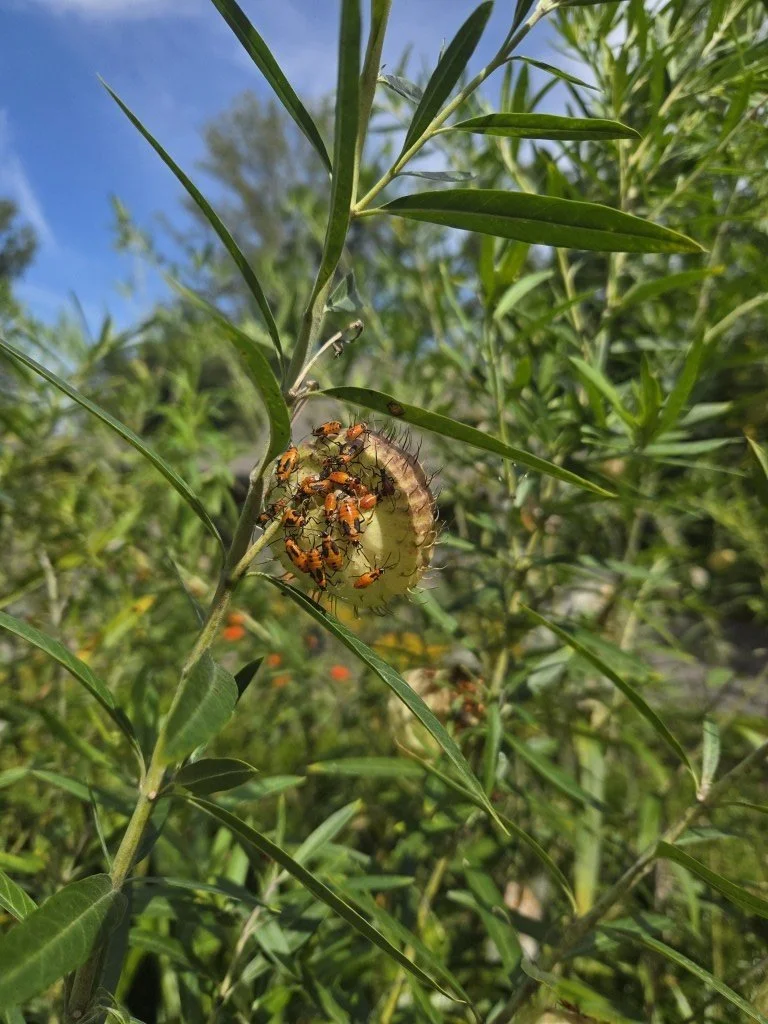
Milkweed bugs on Fuzzy Balls Milkweed. These are young insects. Mature adults have a more distinct pattern of black shield on orange wings.

In an attempt to stop this insect’s Garden of Eden, I have made the difficult decision to skip a year or two of enjoying Fuzzy Balls Milkweed in the garden beds near my home. Instead, I will plant a few seeds in the pollinator bed adjacent to the orchard. It is almost a quarter-mile from the house, so I hope that disrupting their convenient food source near the house will at least reduce their numbers. Will keep you posted.
Greenhouse Gardening in the South: Lessons from My Backyard

The arrival of Labor Day is an indicator that summer is winding down. I am evaluating which of my annuals or borderline tender perennials I need to propagate and overwinter in the greenhouse to ensure that I have them again next year. There is no doubt that the brilliant purple Alternanthera will croak at the first hard frost. The Abutilon (flowering maple), on the other hand, might make it through a mild winter unharmed. Or, it might die if we have harsh cold. Who can predict the weather? So, I took a few cuttings of both this week, along with Mexican Bush Salvia (Salvia leucantha) and Lark Daisy (Centrantherum). I love these last two, and can always find room in my garden for more. Early next spring, I will start flats of annuals from seed. I may buy one Coleus and then propagate more plants from small cuttings off it. Because, you know, I am frugal.

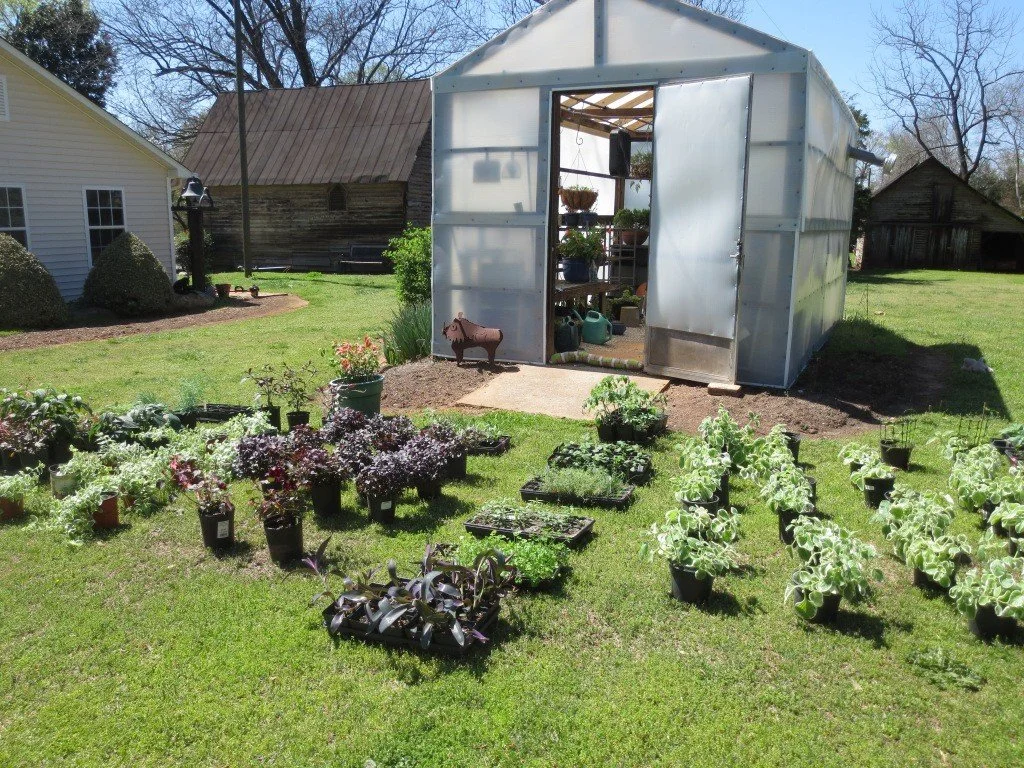
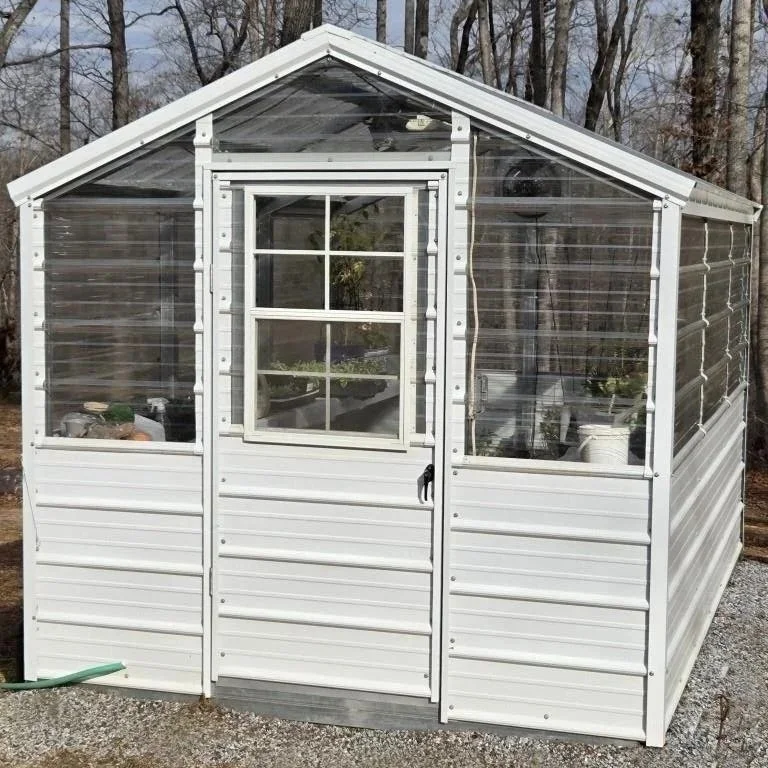
Which brings me to today’s blog topic: my greenhouse. I have owned a steel and polycarbonate greenhouse for three seasons now, and I am very pleased with it. The materials are guaranteed for 20 years. The 8’ x 12’ greenhouse came pre-wired for electricity and included a misting system, plant shelves along both sides, an electric heater mounted overhead, and a thermostatically controlled exhaust fan. In upstate South Carolina, temperatures inside the greenhouse on a sunny day can easily exceed 100 degrees, even when the air temperature is much cooler outside. As a buyer, I was required to provide a level spot for delivery.

The greenhouse is located in an area that receives sun all day. I had the option to select full-view panels, so that light penetrated from all sides. Instead, I elected to purchase a model with steel wainscoting to protect the walls from stones thrown by my lawnmower. Plants that need shade can sit on the floor under the regular shelves and the wainscoting protects them from direct light.

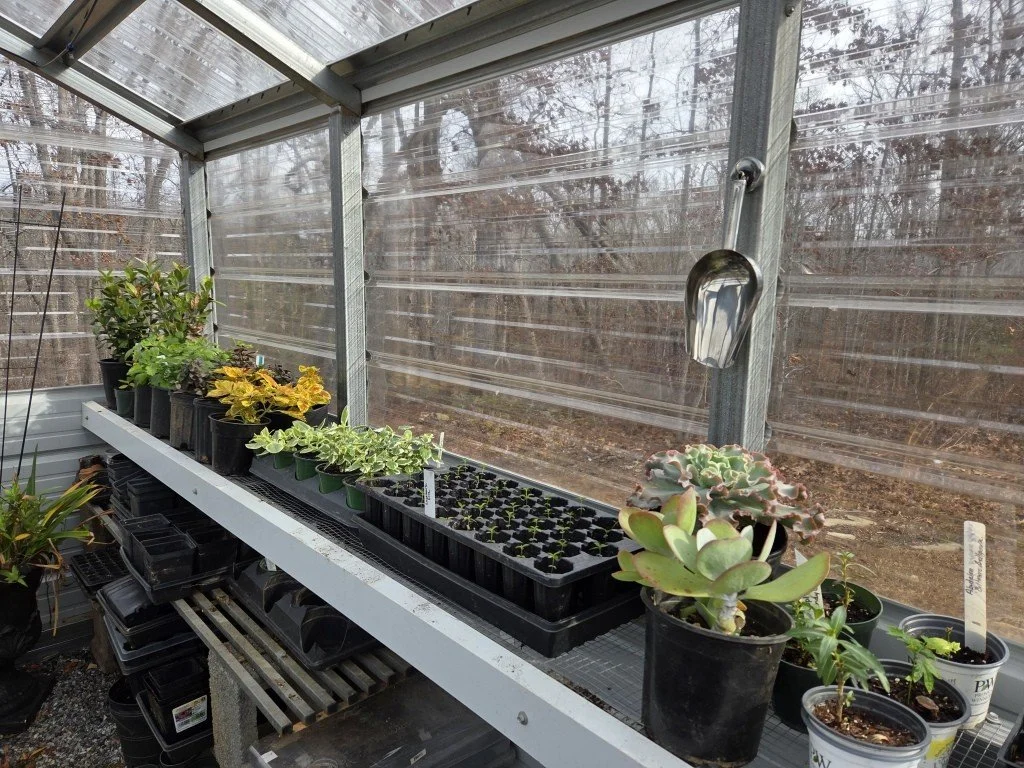
The greenhouse is located close to my home, which made it easy for my licensed handyman to run electricity, water, and natural gas from the house to the unit. I replaced the electric heater included with the purchase with a high-efficiency, natural gas unit designed for damp areas. Handyman connected the water line to a frost-free hydrant, which I then equipped with a four-port manifold. The manifold supplies an outside hose, an inside hose, and the misting system, with one port left free for filling buckets or rinsing muddy boots. I also added an overhead light, a couple of extra power outlets (complete with protective covers so they do not get wet), and some open aluminum slat shelving under the plant shelves for convenient storage of pots, trays, and propagation supplies.

Gardening-minded visitors frequently ask questions about the greenhouse, so let me share opinions based on personal experience. First, you probably need a smaller size than you think. At my last home, I had a 10’ x 16’ unit, made of wood and clad first in hard, wavy plastic which I later replaced with corrugated clear plastic. The wood warped, sagged, and rotted over time. The single-layer plastic did not retain heat and required foam inserts to block air from outside. It became brittle in UV light, hence the need for the replacement noted above. The spacious size meant that the space slowly collected junk – dead plants, cracked pots, half-used bags of potting soil, broken tools waiting to be mended, sweatshirts, and the like. Now, the 8’ x 12’ size makes me somewhat conservative and means that I only propagate or overwinter what I truly love. The smaller space is easier to heat and cool, too. As beautiful as glass-walled greenhouses may be, glass is a poor insulator. The small size enables me to say “no” to friends who want me to overwinter their giant ferns.

Second, you must use a shade cover in the summer. Extended sunlight exposure will cause clear panels to yellow over time and shorten their life. At the previous greenhouse, I used a black shade cloth. For the current one, I ordered a white one off the internet. You can have shade cloth manufactured to your desired size and order grommets spaced along all sides. Mine has lasted through two summers, and looks as good as it did when it arrived. The grommets are used to secure it to the ground outside the structure. I use nylon paracord and run it from a grommet to steel spiral dog tie-out stakes at the four corners. The stakes are easy to twist into my nasty clay soil, but come out when I want to remove them.

An electrical source is mandatory for ventilation and heating. I run a cheap box fan continuously in winter for air circulation to keep my plants healthy and discourage insects. Atop the wire shelves, electric under-tray heating mats aid reliable seed germination. On dark winter days, I use LED grow lights. They consist of four separate lights on flexible metal stems and have a mounting clamp, so I can move them around and adjust the light to keep it just above baby seedlings. Even though the greenhouse is located in a full-sun area, the short and sometimes cloudy days of winter can make the stems of new seedlings elongate as they search for more light.

Underfoot, you can choose treated timber flooring, concrete or brick pavers, or gravel. I find that damp wood gets slippery when wet and may grow moss. I chose the budget route, and selected a small-scale gravel. Someday, I will add a line of 20” x 20” concrete stepping stones down the middle of the floor for the comfort of my feet.

An unanticipated challenge I want to share: the thermostatically controlled exhaust fan is equipped with an external frame that has louvers. The louvers open when the fan is running and close when it is not. I live on a hilltop where winter winds can howl. At times, this meant that the wind opened the louvers during freezing weather, allowing my heated air to escape. Last year, I ran a piece of tape across the louvers so the wind could not open them. I would then need to remove it during warm winter days. I hate running up and down the ladder with a roll of tape. This fall, I plan to design some sort of latch that I can open/close from the ground, eliminating the need for ladder exercise.

I know the questions will pour in, so I will go ahead and share a link to the manufacturer of my greenhouse, Heritage Steel, located in Salisbury, NC: https://heritagesteelgreenhouses.com/ I do not have an ownership interest in the company and do not receive any monetary compensation for mentioning them. Their website describes what is available, and provides a list of dealers who could order one for you (mine came from DP Sales, a tiny roadside garage sale company in Lyman, SC).

Just think about all the money you will save on plants when you can raise your own!”

Current greenhouse, with metal wainscoting to protect the lower portion from damage.

The interior, photo taken in February. The white shade cloth is stored during winter, so that all available light can penetrate the roof and heat the interior. Lower shelves contain growing supplies.

The greenhouse at my former home was larger, and I propagated more than I needed — a waste of time and resources.

@media screen and (max-width: 600px) { #garden-envy-ticker .ticker-message { font-size: 16px !important; padding-right: 30px; } }