Mary Snoddy

Sky Pencil Holly: Prettiest In Youth

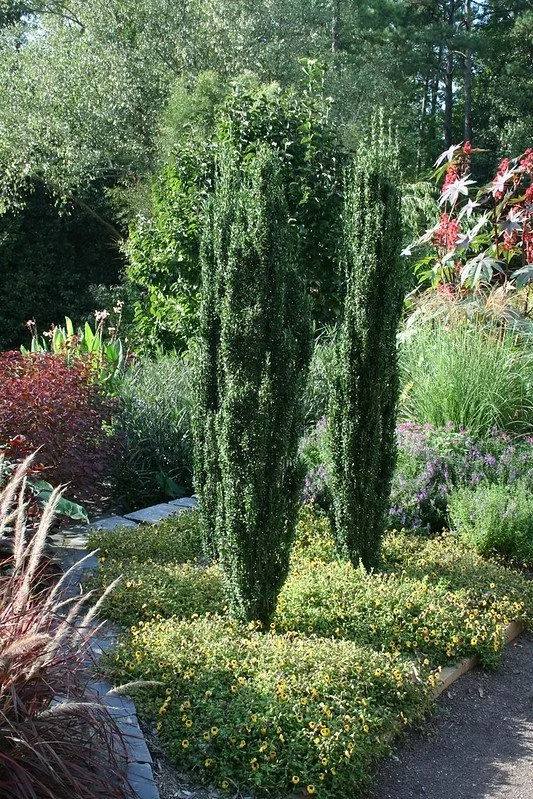
Much of the southeast is experiencing a growth spurt. The latest statistic I heard from my own area of South Carolina is that an average of 29 people move to Spartanburg County every day. New subdivisions are appearing on what was once farmland. With residential lots getting smaller and houses getting closer together, many homeowners are seeking narrow, evergreen shrubs for their gardens. Sky Pencil holly (Ilex crenata 'Sky Pencil’) seems like a perfect choice for a narrow hedge or property line marker.

Members of the holly (Ilex) family are known for their ease of culture. With attention to a few conditions, Sky Pencil can be an excellent, low maintenance choice. It grows slowly so will not get overgrown in a short time. If left unpruned, Sky Pencil will eventually reach a height of eight to ten feet, with a width rarely exceeding one or two feet. It prefers an acidic to neutral soil, and full sun to part shade. In hot areas, a little afternoon shade helps avoid sunburn resulting in yellowing and leaf drop.  It is adaptable to most soil structures from sand to clay. It will not tolerate alkaline soil, drought, or constantly wet conditions. Sky Pencil is winter hardy in zones 5-8. Provide protection from cold winds, and mulch around the base to provide insurance against frost heaving or competition from weeds. To keep Sky Pencil hollies looking their best, prune the tops of the tallest branches once or twice during the warmer months to maintain a uniform appearance.

There is a downside to Sky Pencil. It can be a reverse ugly duckling, looking beautiful in its youth but developing some unattractive behavior as it gets older and taller. After shrubs reach six feet, they tend to separate and spraddle at the top. Ice storms or wet snow can also make them splay out like a mop head. Some gardeners wrap fishing monofilament line around the tops of these shrubs to corral the spreaders. Please do not do this. The line will eventually cut into the branches and result in limb death. If a winter ice storm is forecast and you want to protect your plants, circle the tops with soft, stretchy material (old pantyhose or tights work well) and remove the restraint as soon as weather danger has passed. Unless your soil is devoid of fertility, I would bypass the addition of fertilizer. It will hasten the vertical growth, yes, but it will also hasten the possibility of top separation.

Young Sky Pencil hollies can fulfill the “thriller” role in containers without crowding out companion plants. They can also be used in small formal gardens to provide a vertical feature when other fastigiate plants might be too broad for the space. Example: Fastigiate upright plum yew (Cephalotaxus harringtonia fastigiata) makes a super focal point in landscape borders, but with time it will grow to five feet wide.

So, what do you do when the perfect plant becomes perfectly ugly? The same thing you do with Rosemary when it changes from an attractive, aromatic shrub into a woody, ugly thing: remove it and replace it with a younger model of the same plant.

Weird and Wiry Porterweed

This spring, I spotted an unfamiliar plant at a local arboretum. I made a mental note to research it; I promptly forgot. I saw it again last week. The flowers were covered in butterflies and the plant was just as weird looking as I remembered. Porterweed, Stachytarpheta, pronounced stake-kee-tar-FEE-tuh, is native to the Caribbean. It is common in the southernmost parts of Florida. If you crave the unusual for your garden, this is the plant for you.

Porterweed is winter hardy only in zones 10 and warmer. Grow it as an annual in cooler zones. Where is it perennial, Porterweed may reach a height of six feet and can be used for informal hedges. In zones 7 and 8, three feet is a reasonable estimate for single-season growth. Porterweed wants full sun but will tolerate light shade at the expense of reduced flowering. Porterweed loves heat. When grown as an annual, it will bloom continuously from late spring all the way to frost. Provide well-draining soil to avoid root rot issues, and plan to irrigate regularly to keep this sub-shrub looking its best. Where native soil is heavy clay, it is likely to be happiest when grown in a container. Give it a slow-release fertilizer at planting time, and provide a liquid feed booster once or twice in the growing season. All those flowers take a lot of energy!

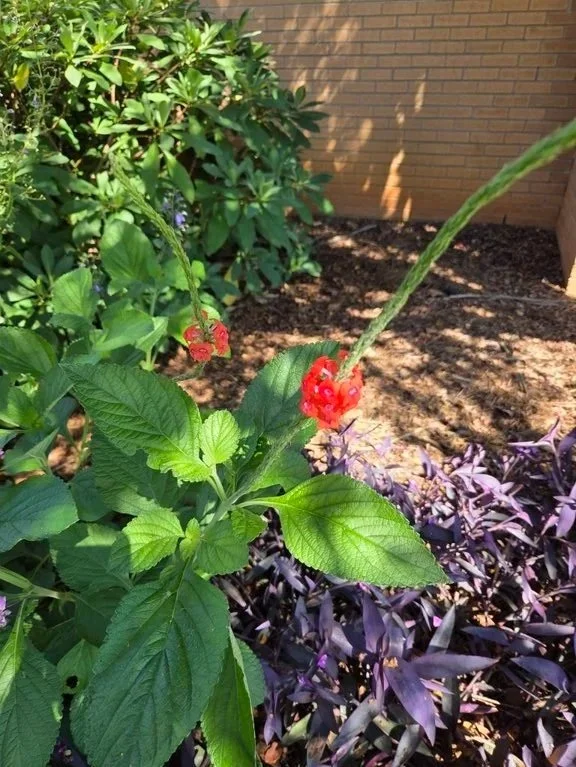
While flower stems are generally upright, some twist around in a loose alien orbit. Flower stems on the plants I observed were 24 to 30 inches in length. The plants are self-cleaning, which means their spent flowers shed without help from the gardener. Remove spent stems for a neater appearance. I spotted three colors: blue, purple, and a reddish-coral. The coral plants were shorter than their purple cousins, so I believe them to be a different species within the same genus.

Porterweed’s long flowering period and heavy nectar production makes it an ideal choice for pollinator gardens.

An Allium for All Gardens

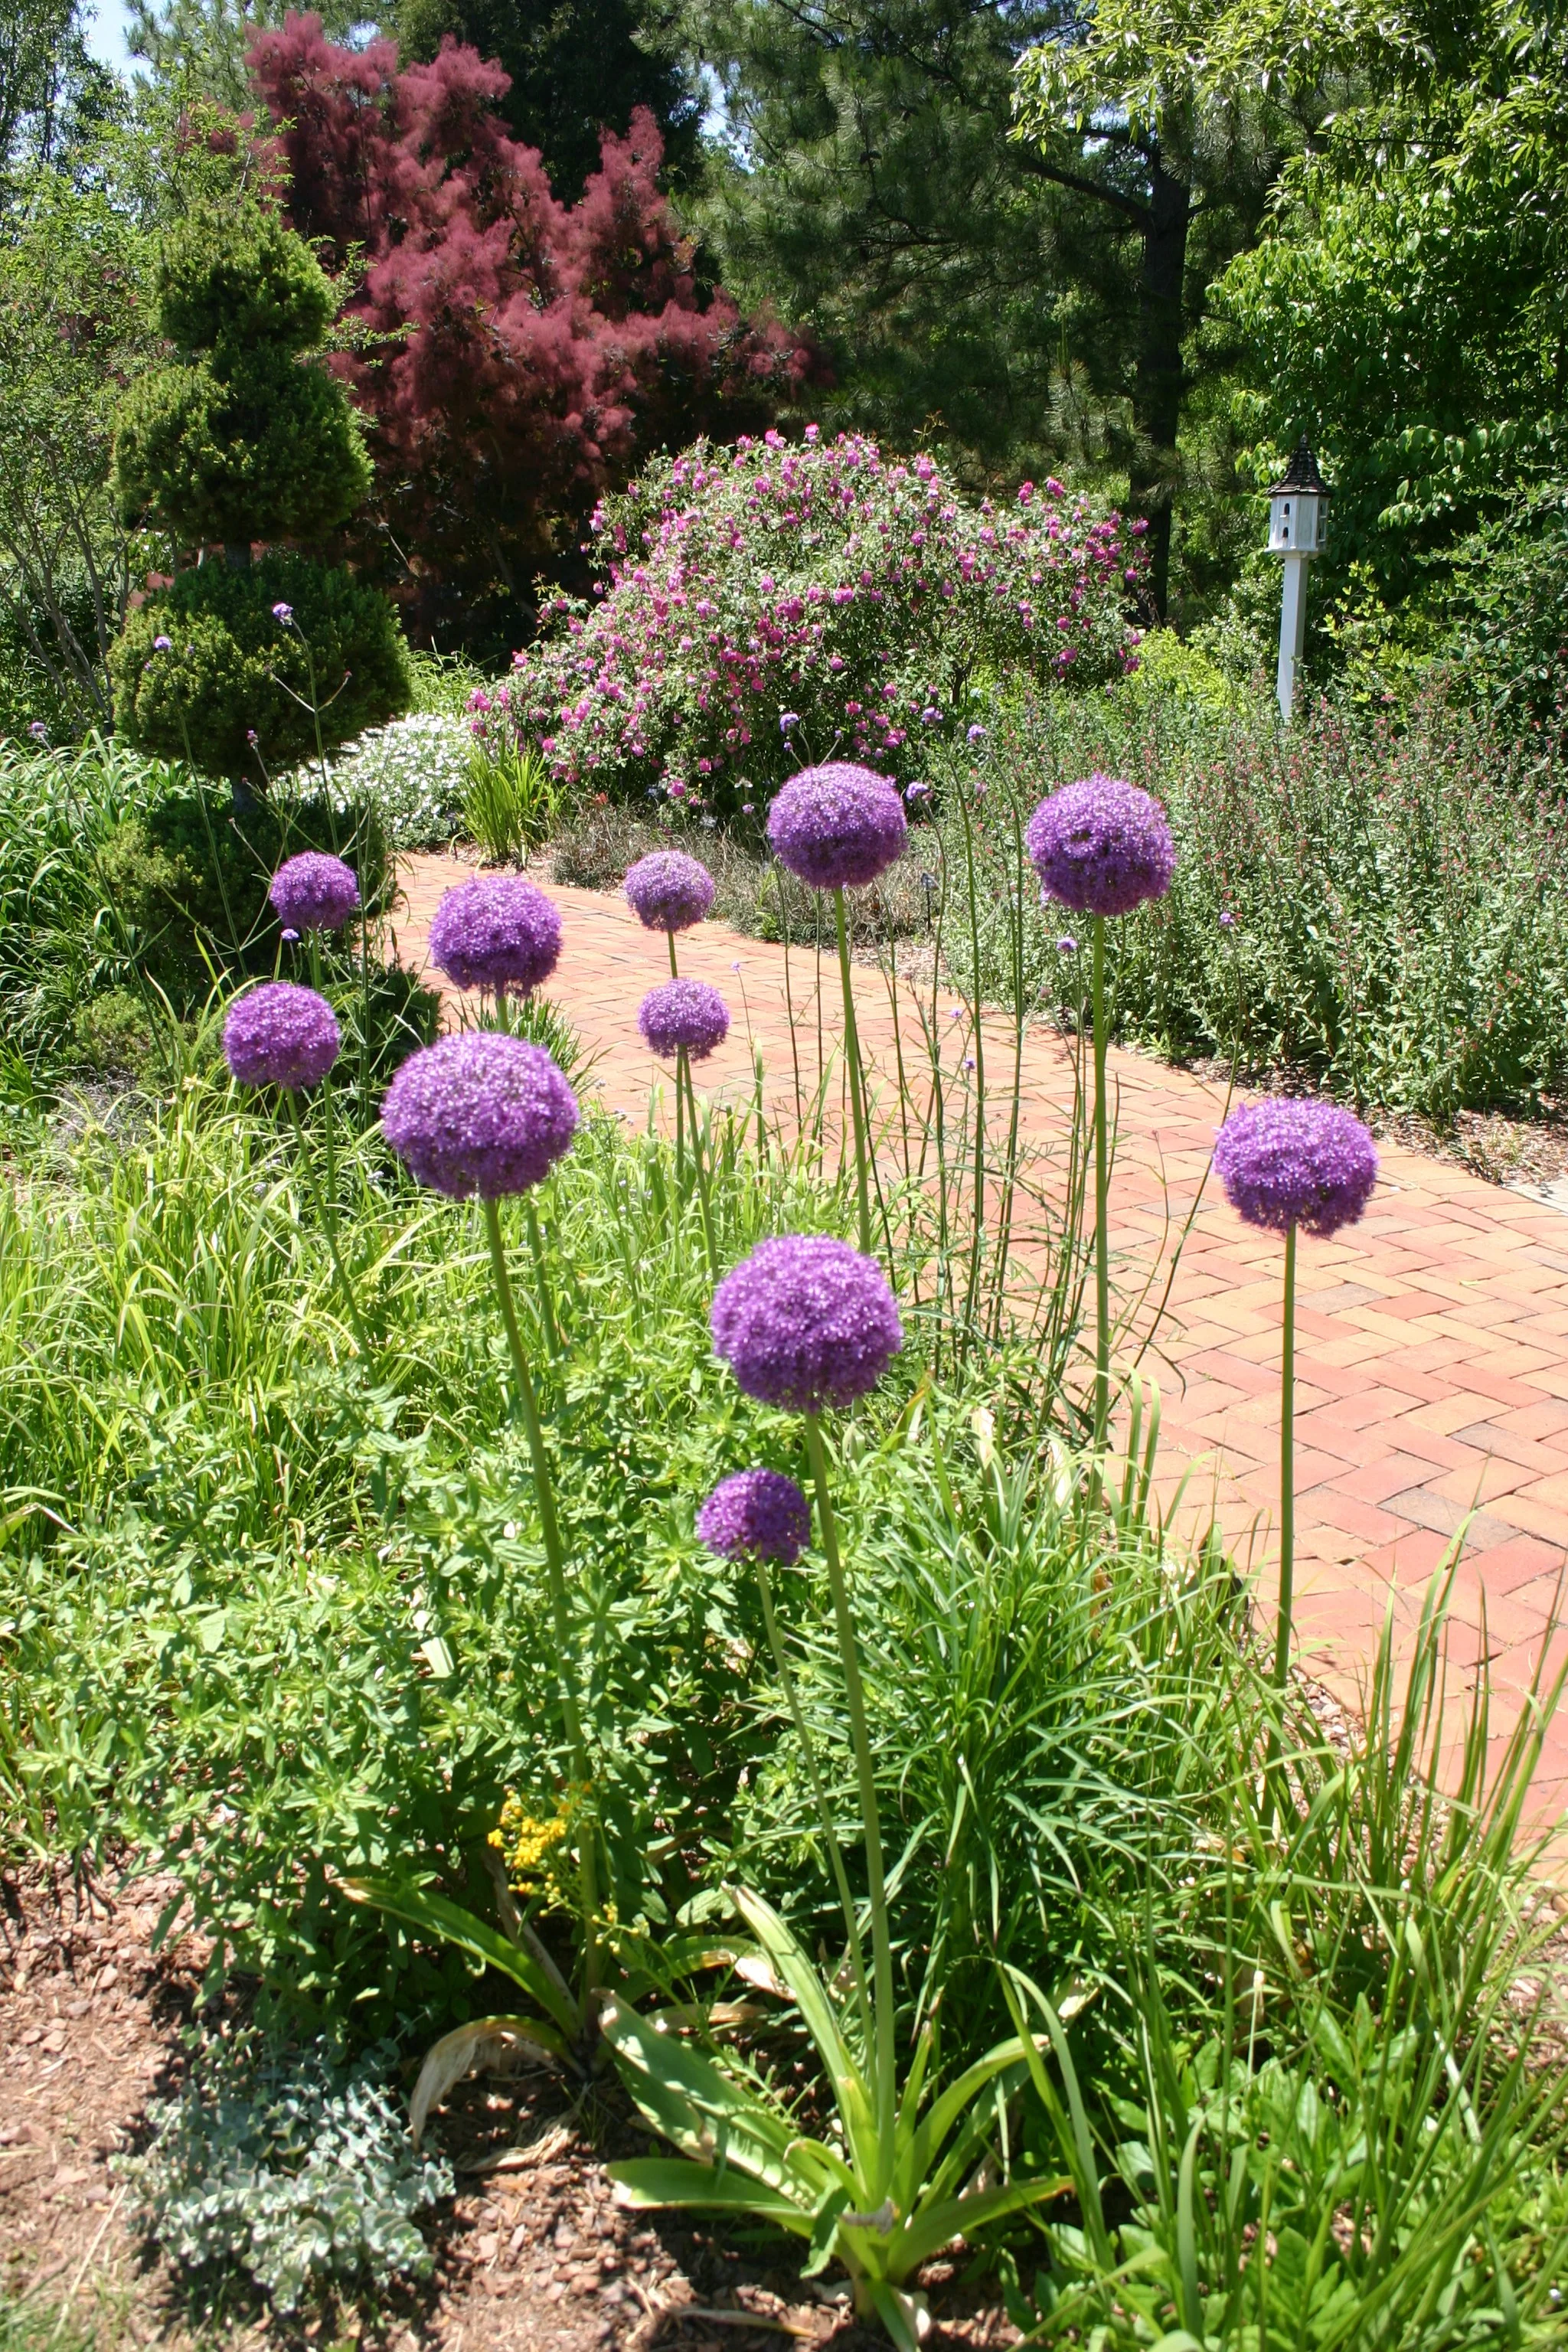
Several years ago, I saw Allium (Ornamental Onion) in bloom at the Daniel Stowe Botanical Garden. It was a first for me, and I was immediately smitten by the softball-sized purple flowers on tall stems, floating above the surrounding plants. They looked almost other-worldly. I ordered Allium giganteum bulbs and planted them in my own garden.

Allium in a mixed bed at Daniel Stowe Botanical Garden, Belmont NC. It is now known at the Daniel Stowe Conservancy.

The first thing I learned was that tall flowers on skinny stems need to be staked in areas with frequent summer thunderstorms. I hate staking. The second thing I learned was Allium are not long-lived bulbs, or at least they were not for me. By the fourth year, my planting had dwindled down to a single bulb reappearance. By year five they were entirely gone. I was disappointed, but not every plant will thrive in every garden. I decided against replanting them.

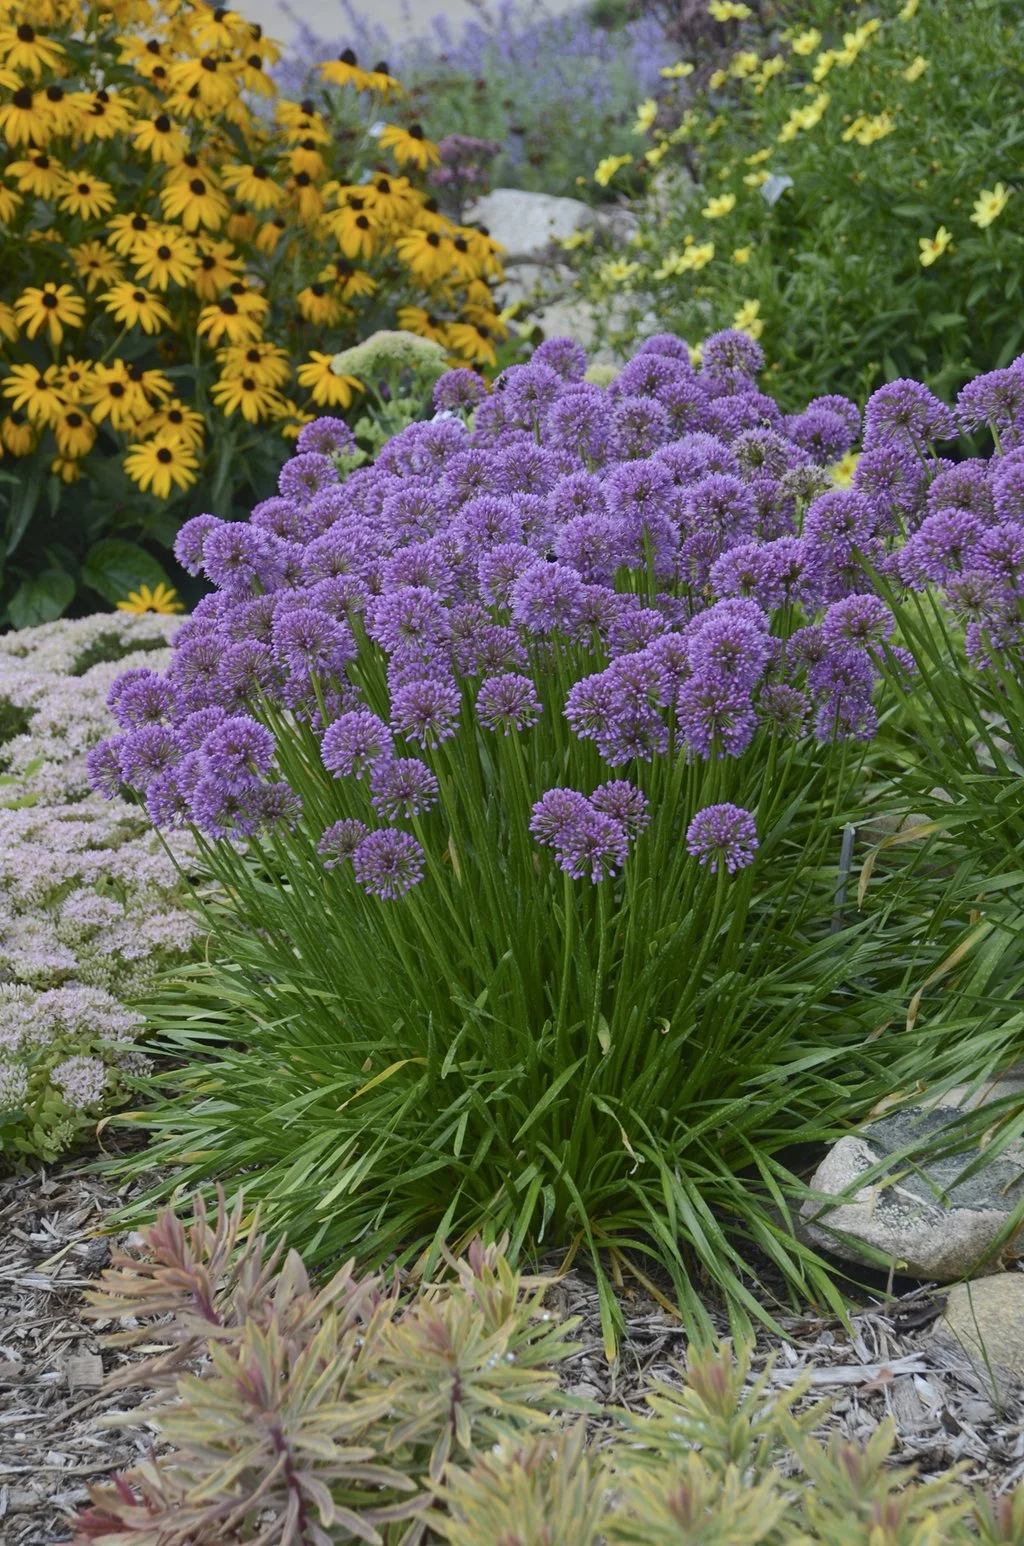
Then, Proven Winners™ introduced ‘Millenium’ Ornamental Onion. The garden world was abuzz with enthusiasm, and in 2018 it was named Plant of the Year by the Perennial Plant Association. Millenium’s shorter height – just 15 to 20 inches – means no staking. It is adaptable to different soil types, neutral or acidic. It is hardy in zone 4 through 9. All Alliums are deer resistant and are rarely bothered by insects or diseases. Give them full sun. They are drought tolerant.

Although they are bulbs, ‘Millenium’ Alliums are not usually sold as bare bulbs but as potted plants in leaf, like other perennials. Marketing photographs of them show large clusters of rosy purple flowers. They look a bit like Chives on steroids. I added a few to my garden and waited. The first year I had foliage only. The second year, a paltry few flowers appeared. This year, though, my patience was repaid with a beautiful floral show beginnng in July. The fragrant flowers have lasted weeks and weeks. Bees and butterflies love them. They would work well in containers also. If you prefer the taller Allium, there are numerous cultivars available via specialty bulb nurseries.

This photo of Millenium Ornamental Onion is from the Proven Winners website. Here is a link to their page: https://www.provenwinners.com/plants/allium/millenium-ornamental-onion-allium-hybrid

Lovely Luna Moths

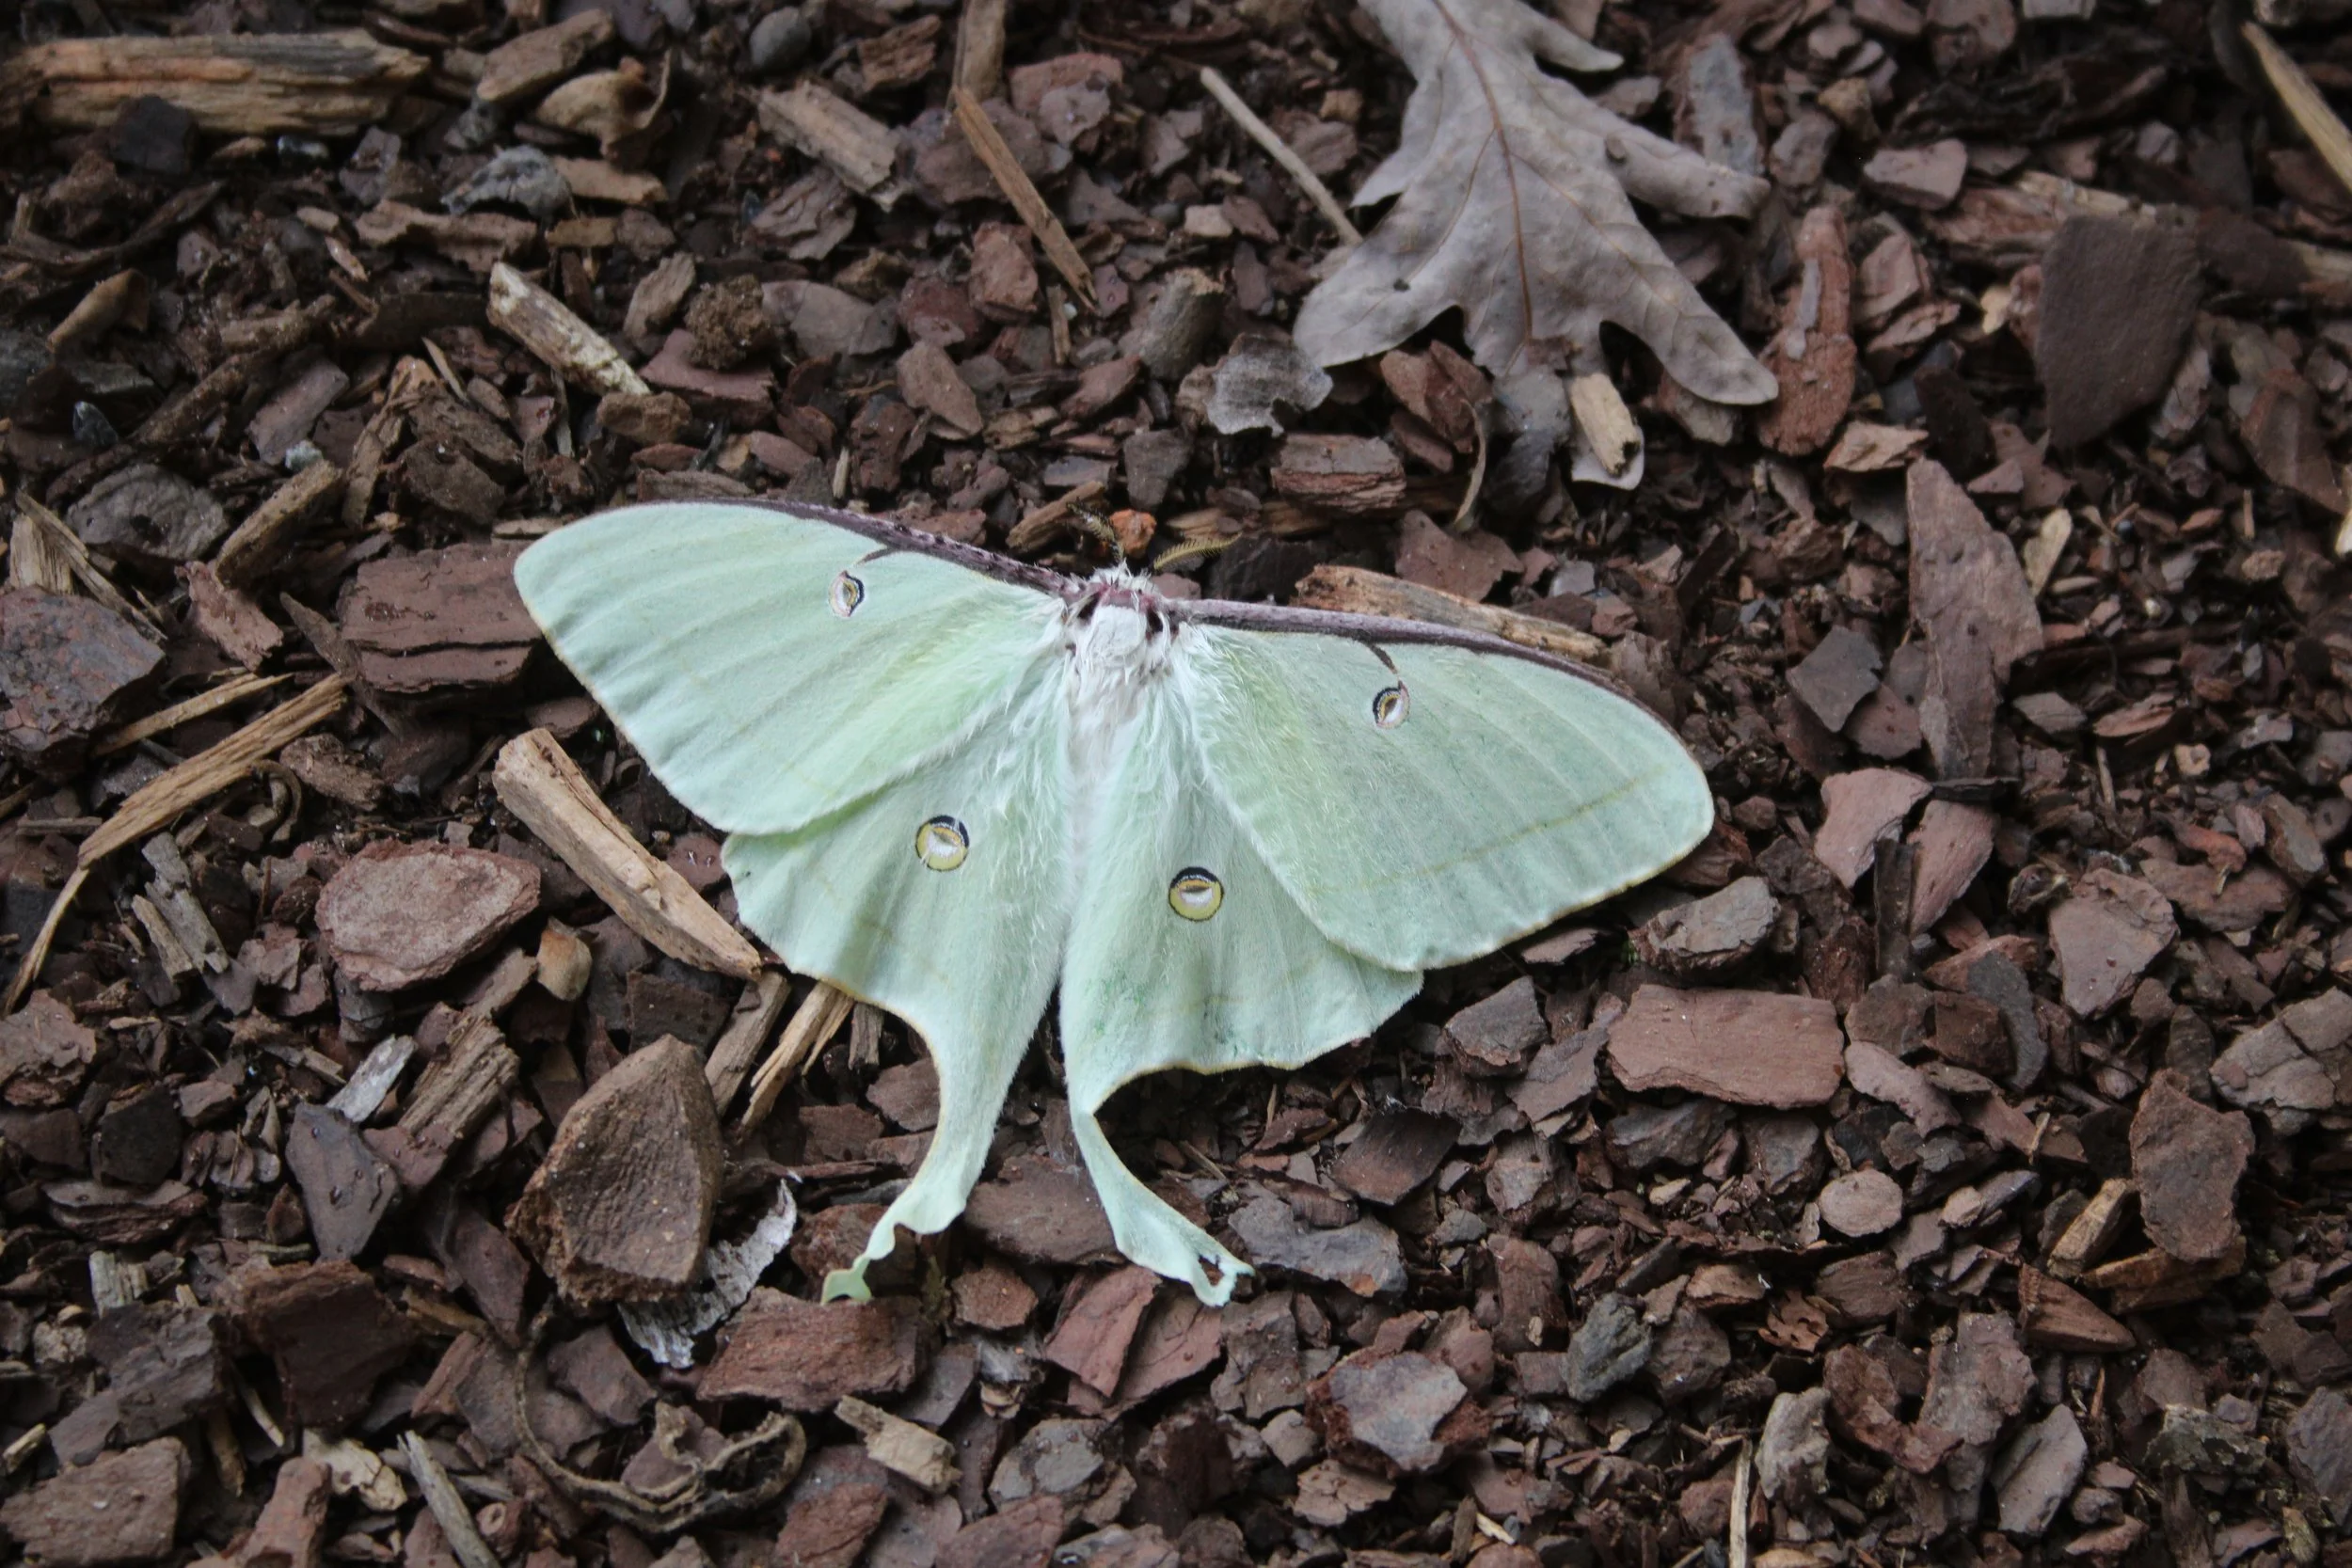
After thirty-plus days of ninety degrees or more, my area of the southeast has enjoyed plentiful rains and unusually cool, fall-like temperatures. My brown lawn has turned green, almost overnight. Annuals and perennials are renewed, pushing out new flowers and fresh leaves. Bees and butterflies cover the butterfly bushes and Joe Pye Weed, while hummingbirds are zooming from plant to plant. Yesterday, I spotted a Luna moth. These large, pale green moths are rare. I decided to research their preferred plant foods so that I could add more to next year’s garden. That is when I made a sad, sad discovery. Luna moths are “born” (emerge from their chrysalis) without a working mouth or digestive system. They cannot eat. Instead, they breed, lay eggs, and die of starvation within a week.

Luna moths are among the largest in North America, with a wingspan up to four inches. They are found in or near deciduous forests of hickory, beech, and birch trees. Lunas have a complete metamorphosis, going from eggs to larvae (caterpillar) to pupa (chrysalis) to adult. Luna caterpillars go through five growth stages, called instars, gaining in size with each stage. Then they form a pupa encased in a protective cocoon. The adult emerges from the cocoon.The entire lifespan, egg to death, may take a few weeks in warm areas or last up to a year in cold areas. In the south, there may be two (rarely, three) generations per year. In the cooler northern zones, there is one generation per year.

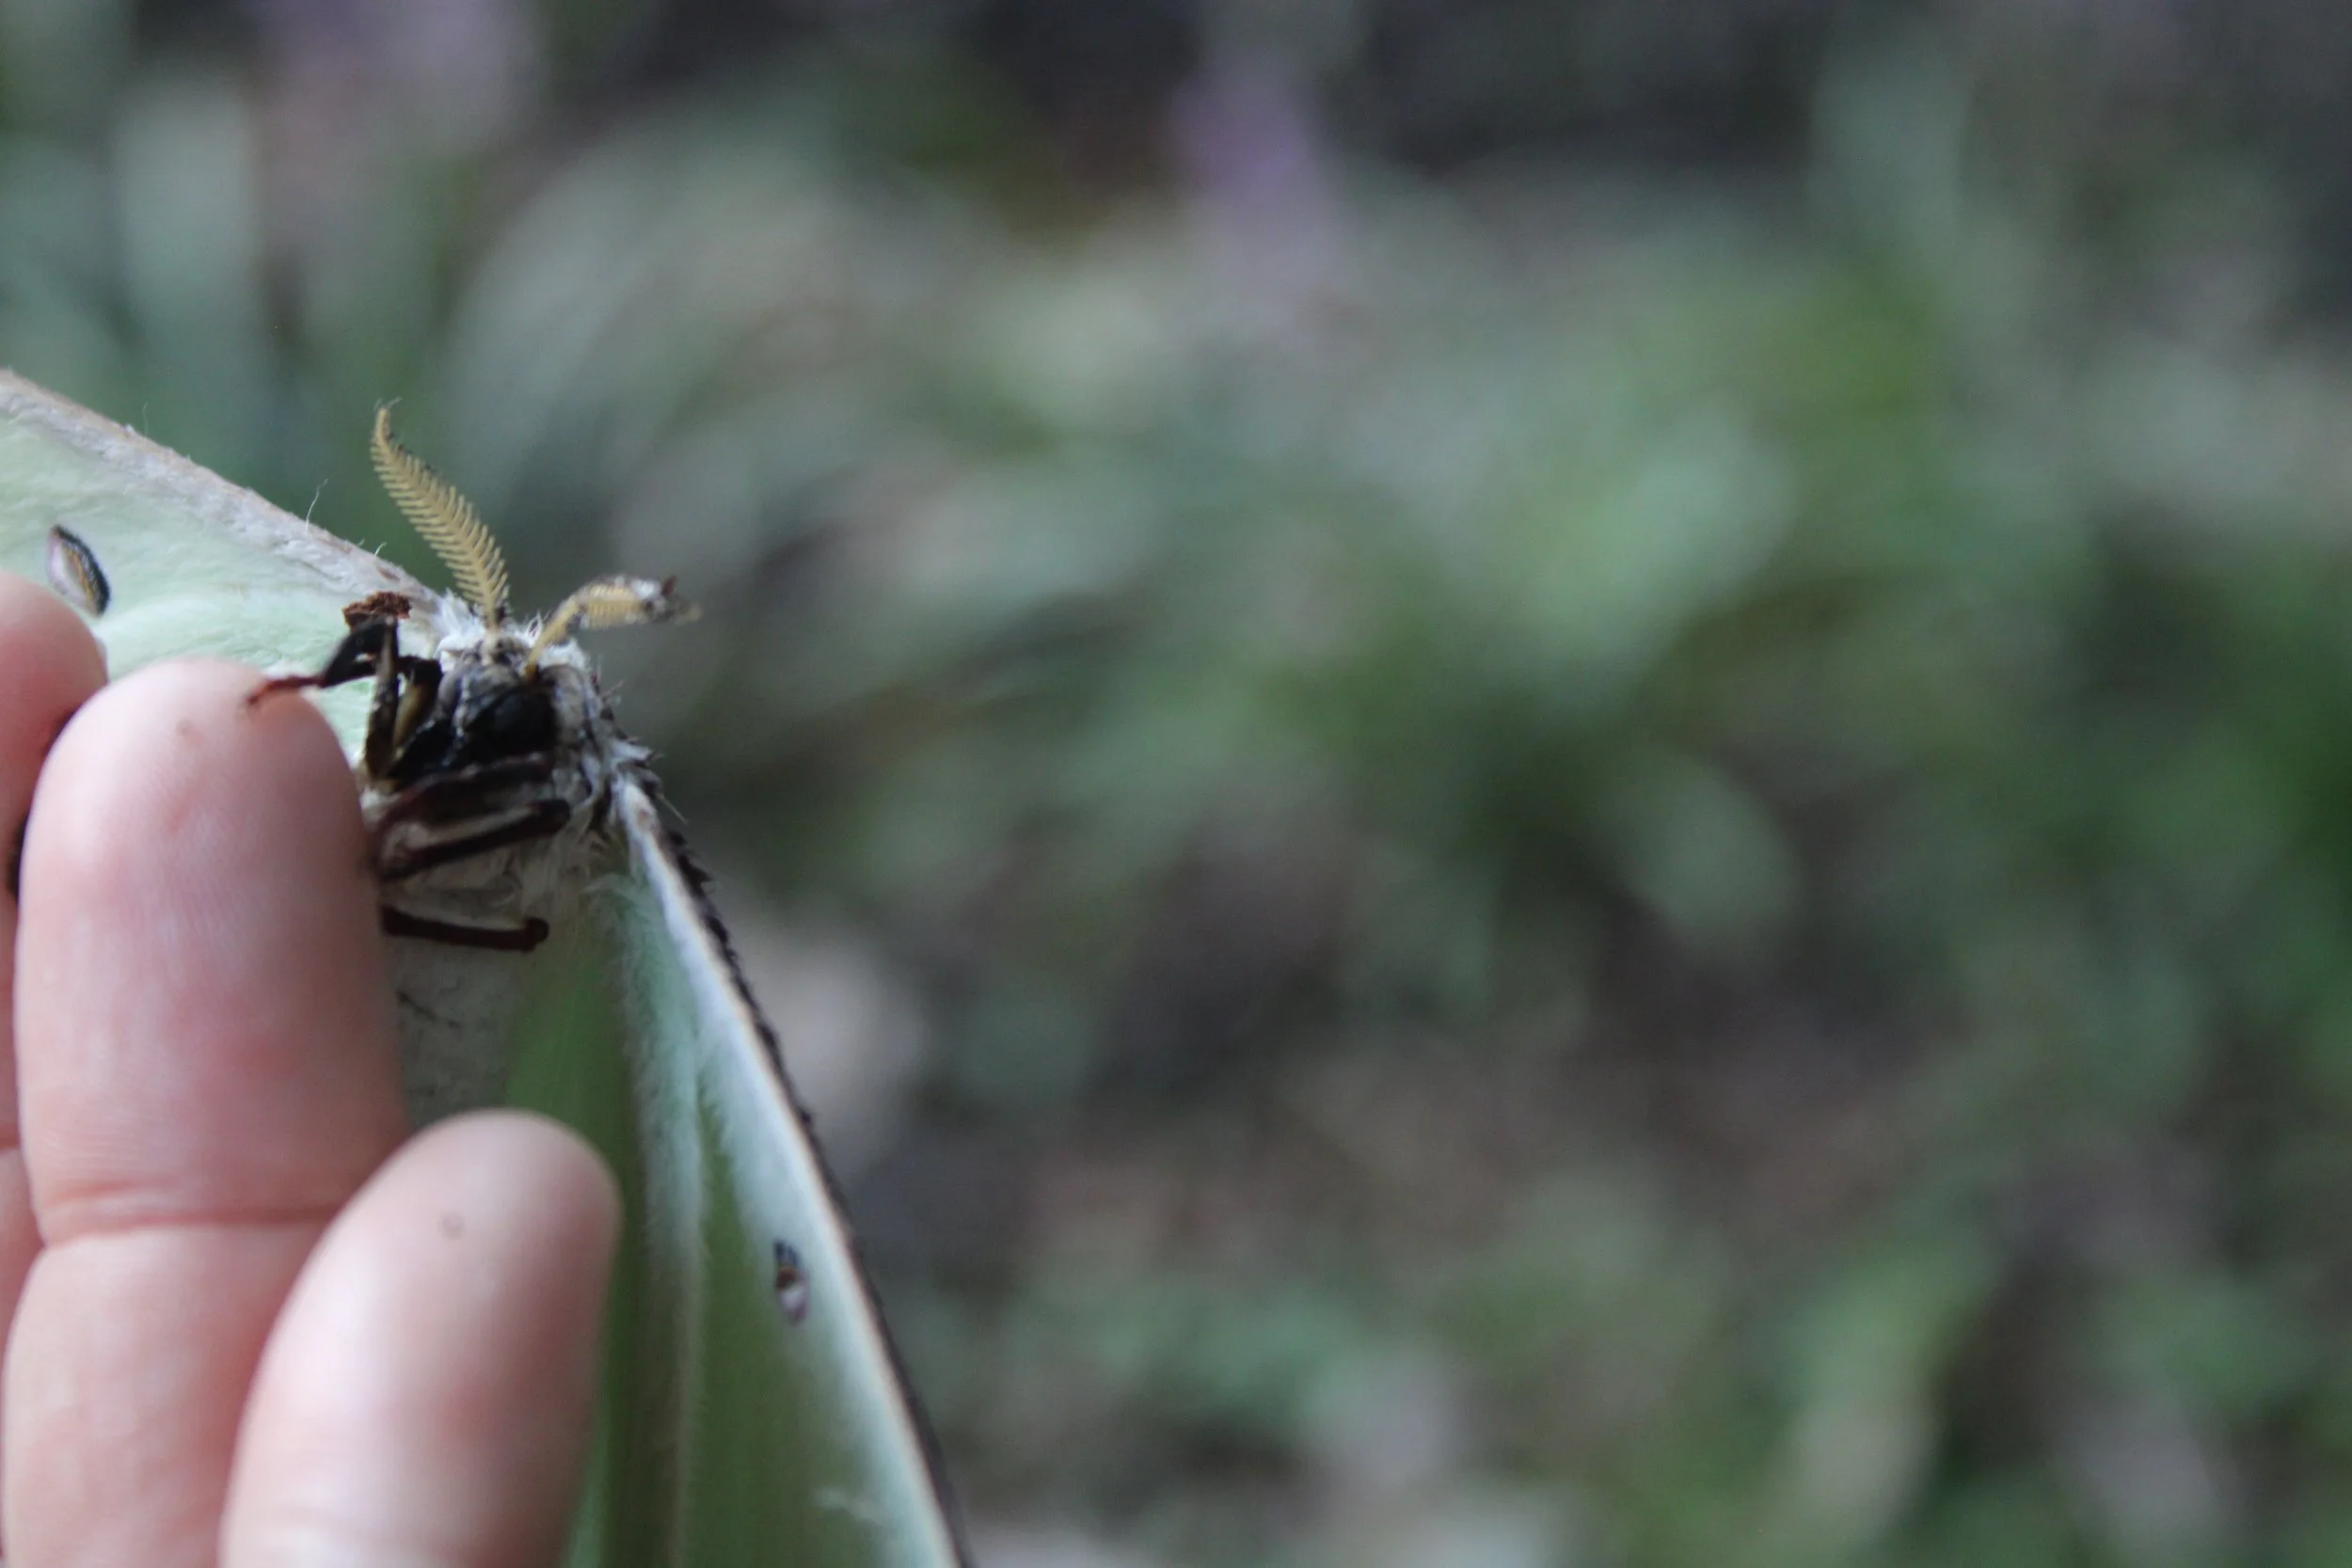
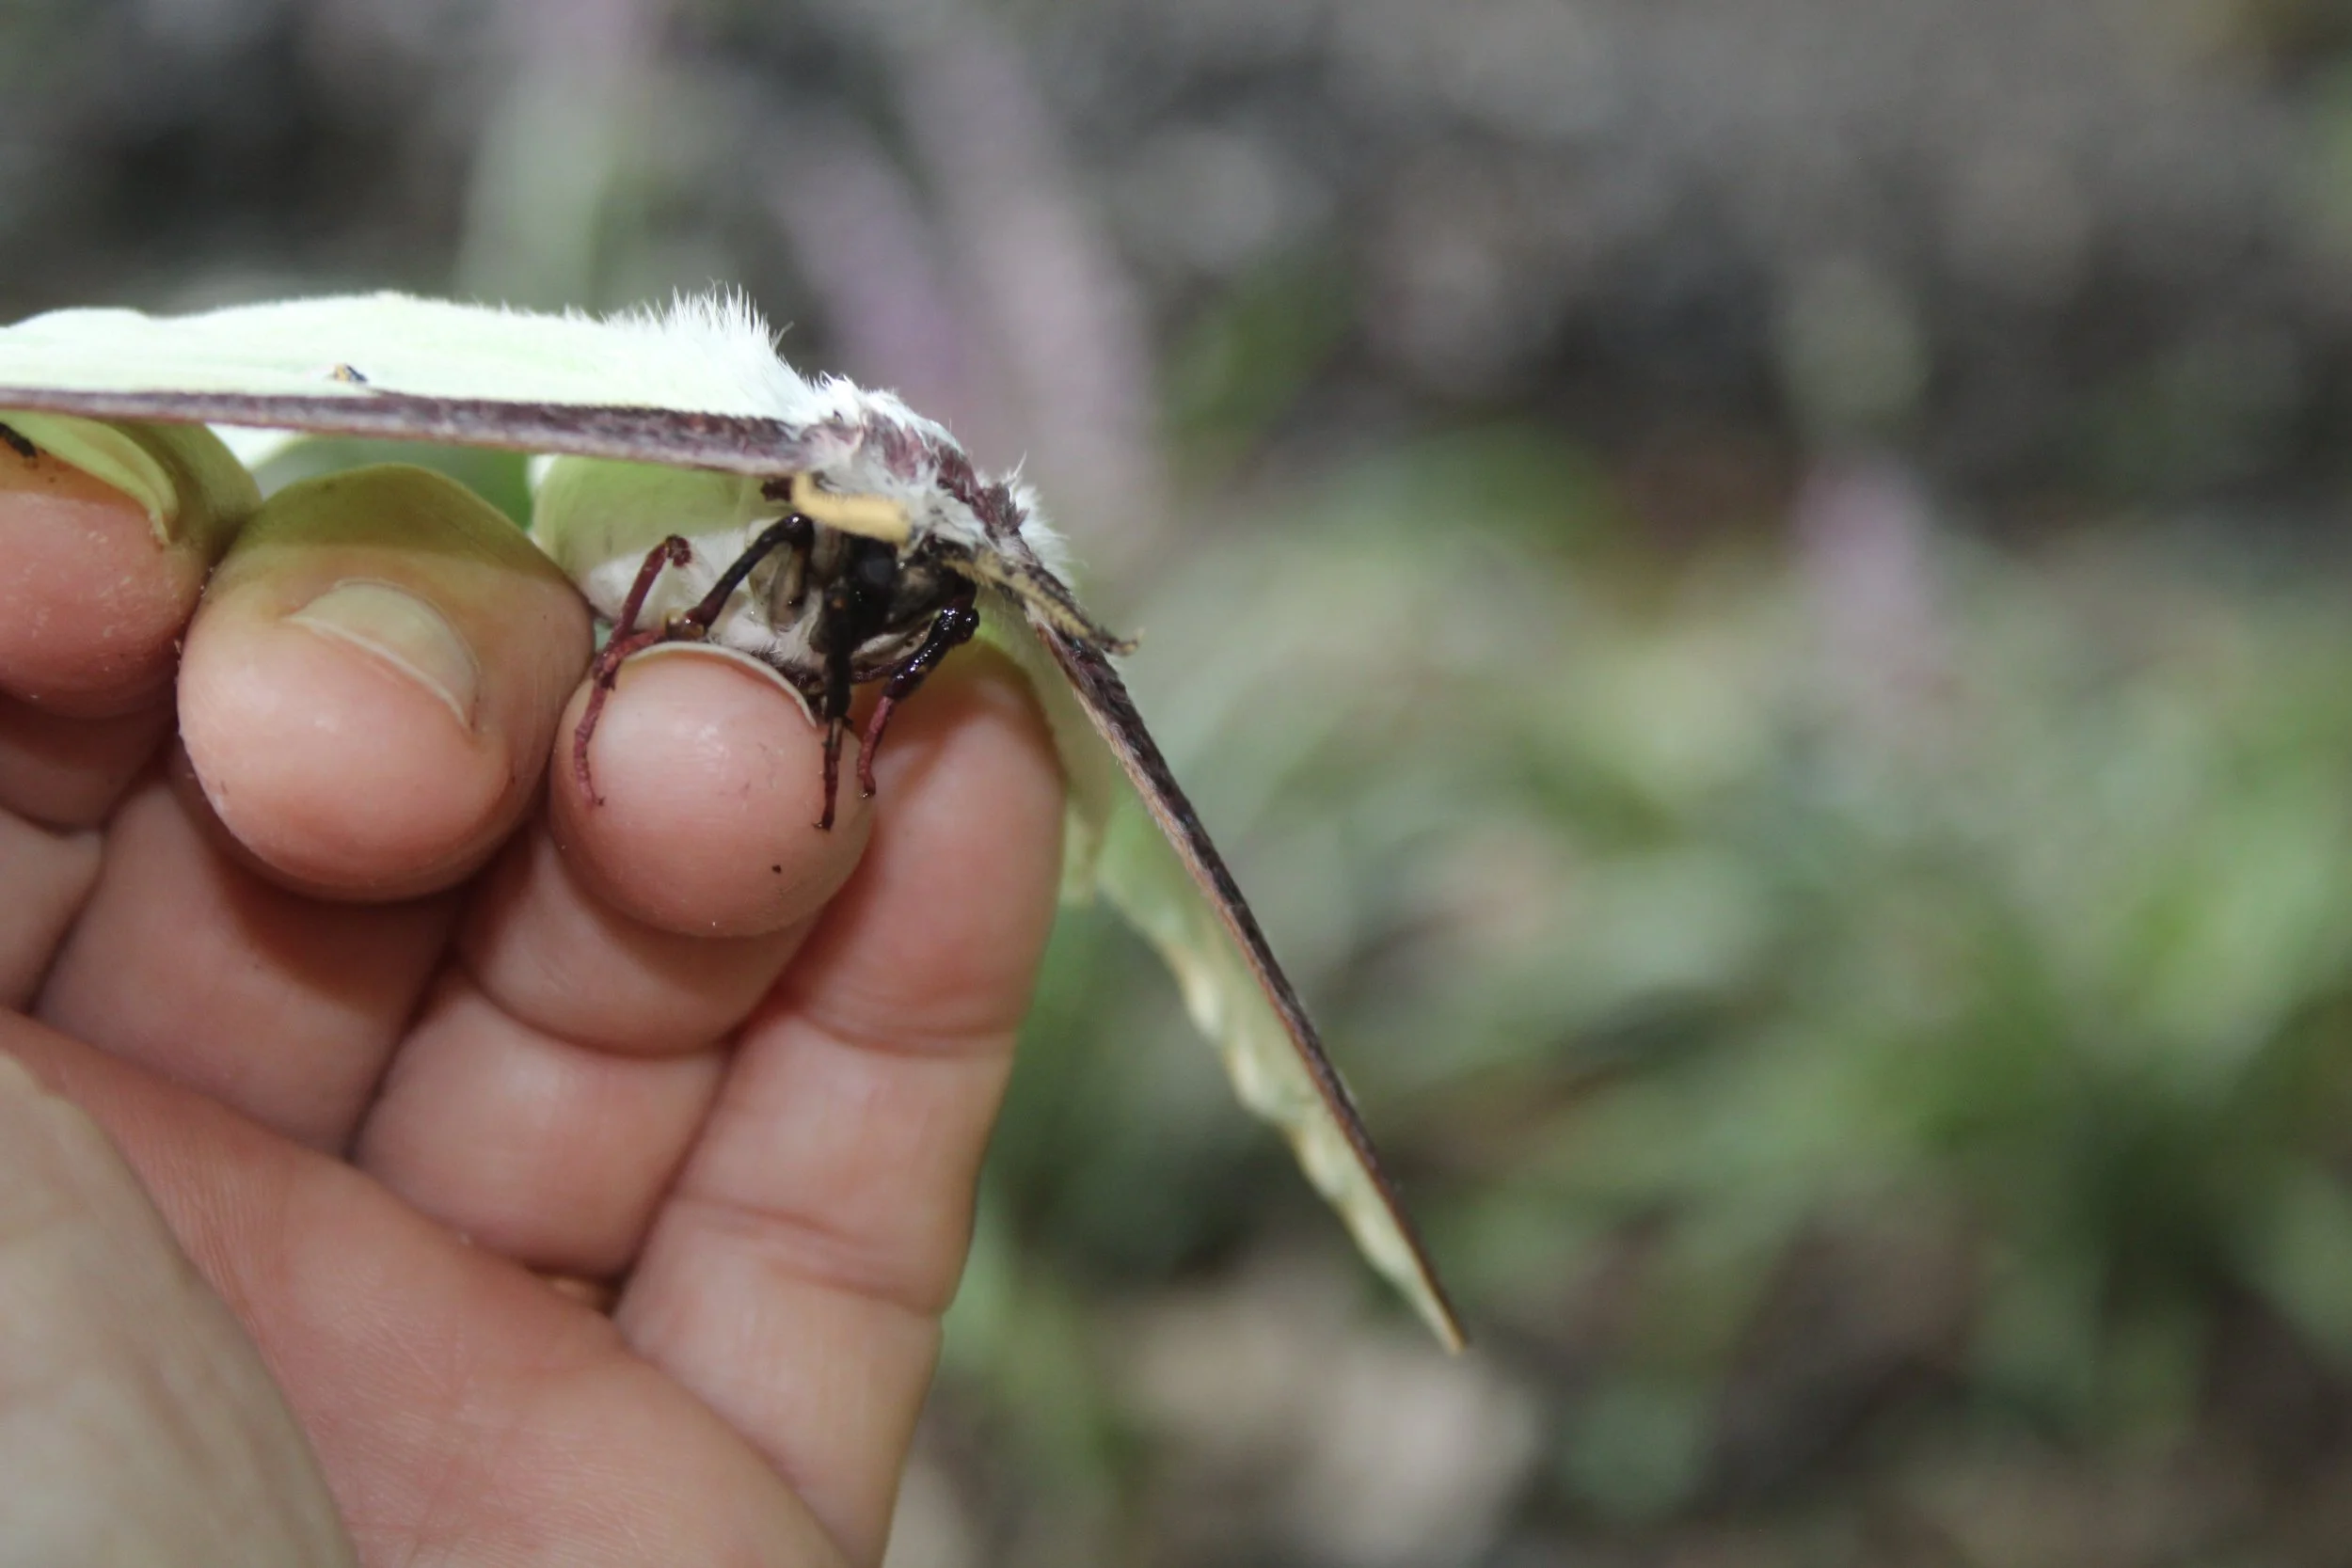
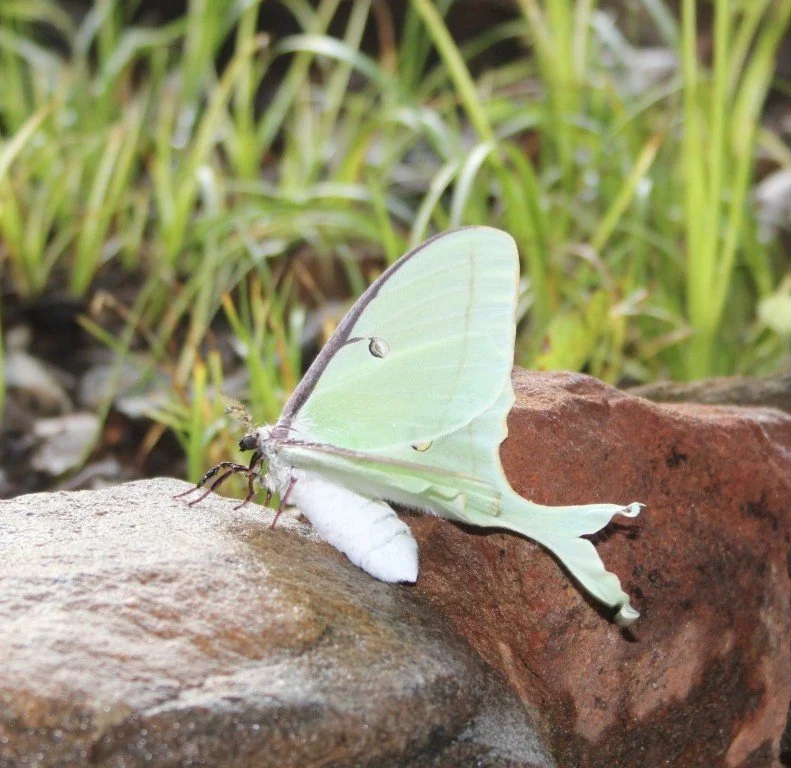
From these photos, you can see that Luna moths have large, fuzzy bodies that must look like a taste treat to predators. The adults’ only means of protection is its lovely green color, which blends in with surrounding leaves. The streaks and spots on their wings may appear twig-like to an insectivore looking for a meal. The caterpillars have an assertive way of fending off predators. When they sense a threat, they rear up and make a clicking sound. If that doesn’t work, they vomit a foul-smelling liquid. What a way to protect oneself!

Adult Luna moths blend in so well with leaves and tree bark, the only time humans are likely to see them is when they are attracted by artificial lighting to alight on door frames or siding. Unlike butterflies, which have skinny antennae with bulbous ends, moths have feather-like antennae. If you are fortunate enough to see one, take time to admire their delicate, fleeting beauty.

To end this blog on a positive note, I am including a short video of Eastern Swallowtail butterflies on my butterfly bushes. These are Buddleia ‘Pugster’ cultivar, a dwarf sterile form I have grown for four years now. They have not outgrown their labeled size, which is a big plus. Their sterility means I don’t worry about them spreading into unwanted areas.

A second positive thing: By now, we all know that Burning Bush, Euonymus alatus, is invasive. Proven Winners™ has released a seedless form, Fire Ball Seedless® so we can continue to enjoy Burning Bush’s wonderful red fall foliage without guilt.

Swallowtail butterflies on butterfly bush

Bountiful Betony

I tend to take for granted the low-maintenance, high-performing plants in my flower gardens while I obsess over the Japanese Beetles on the roses, the rust on the Daylilies, or the brittle stems of the Gaillardia. It wasn’t until a visitor commented on the beauty of my Betony that I focused my attention on it.

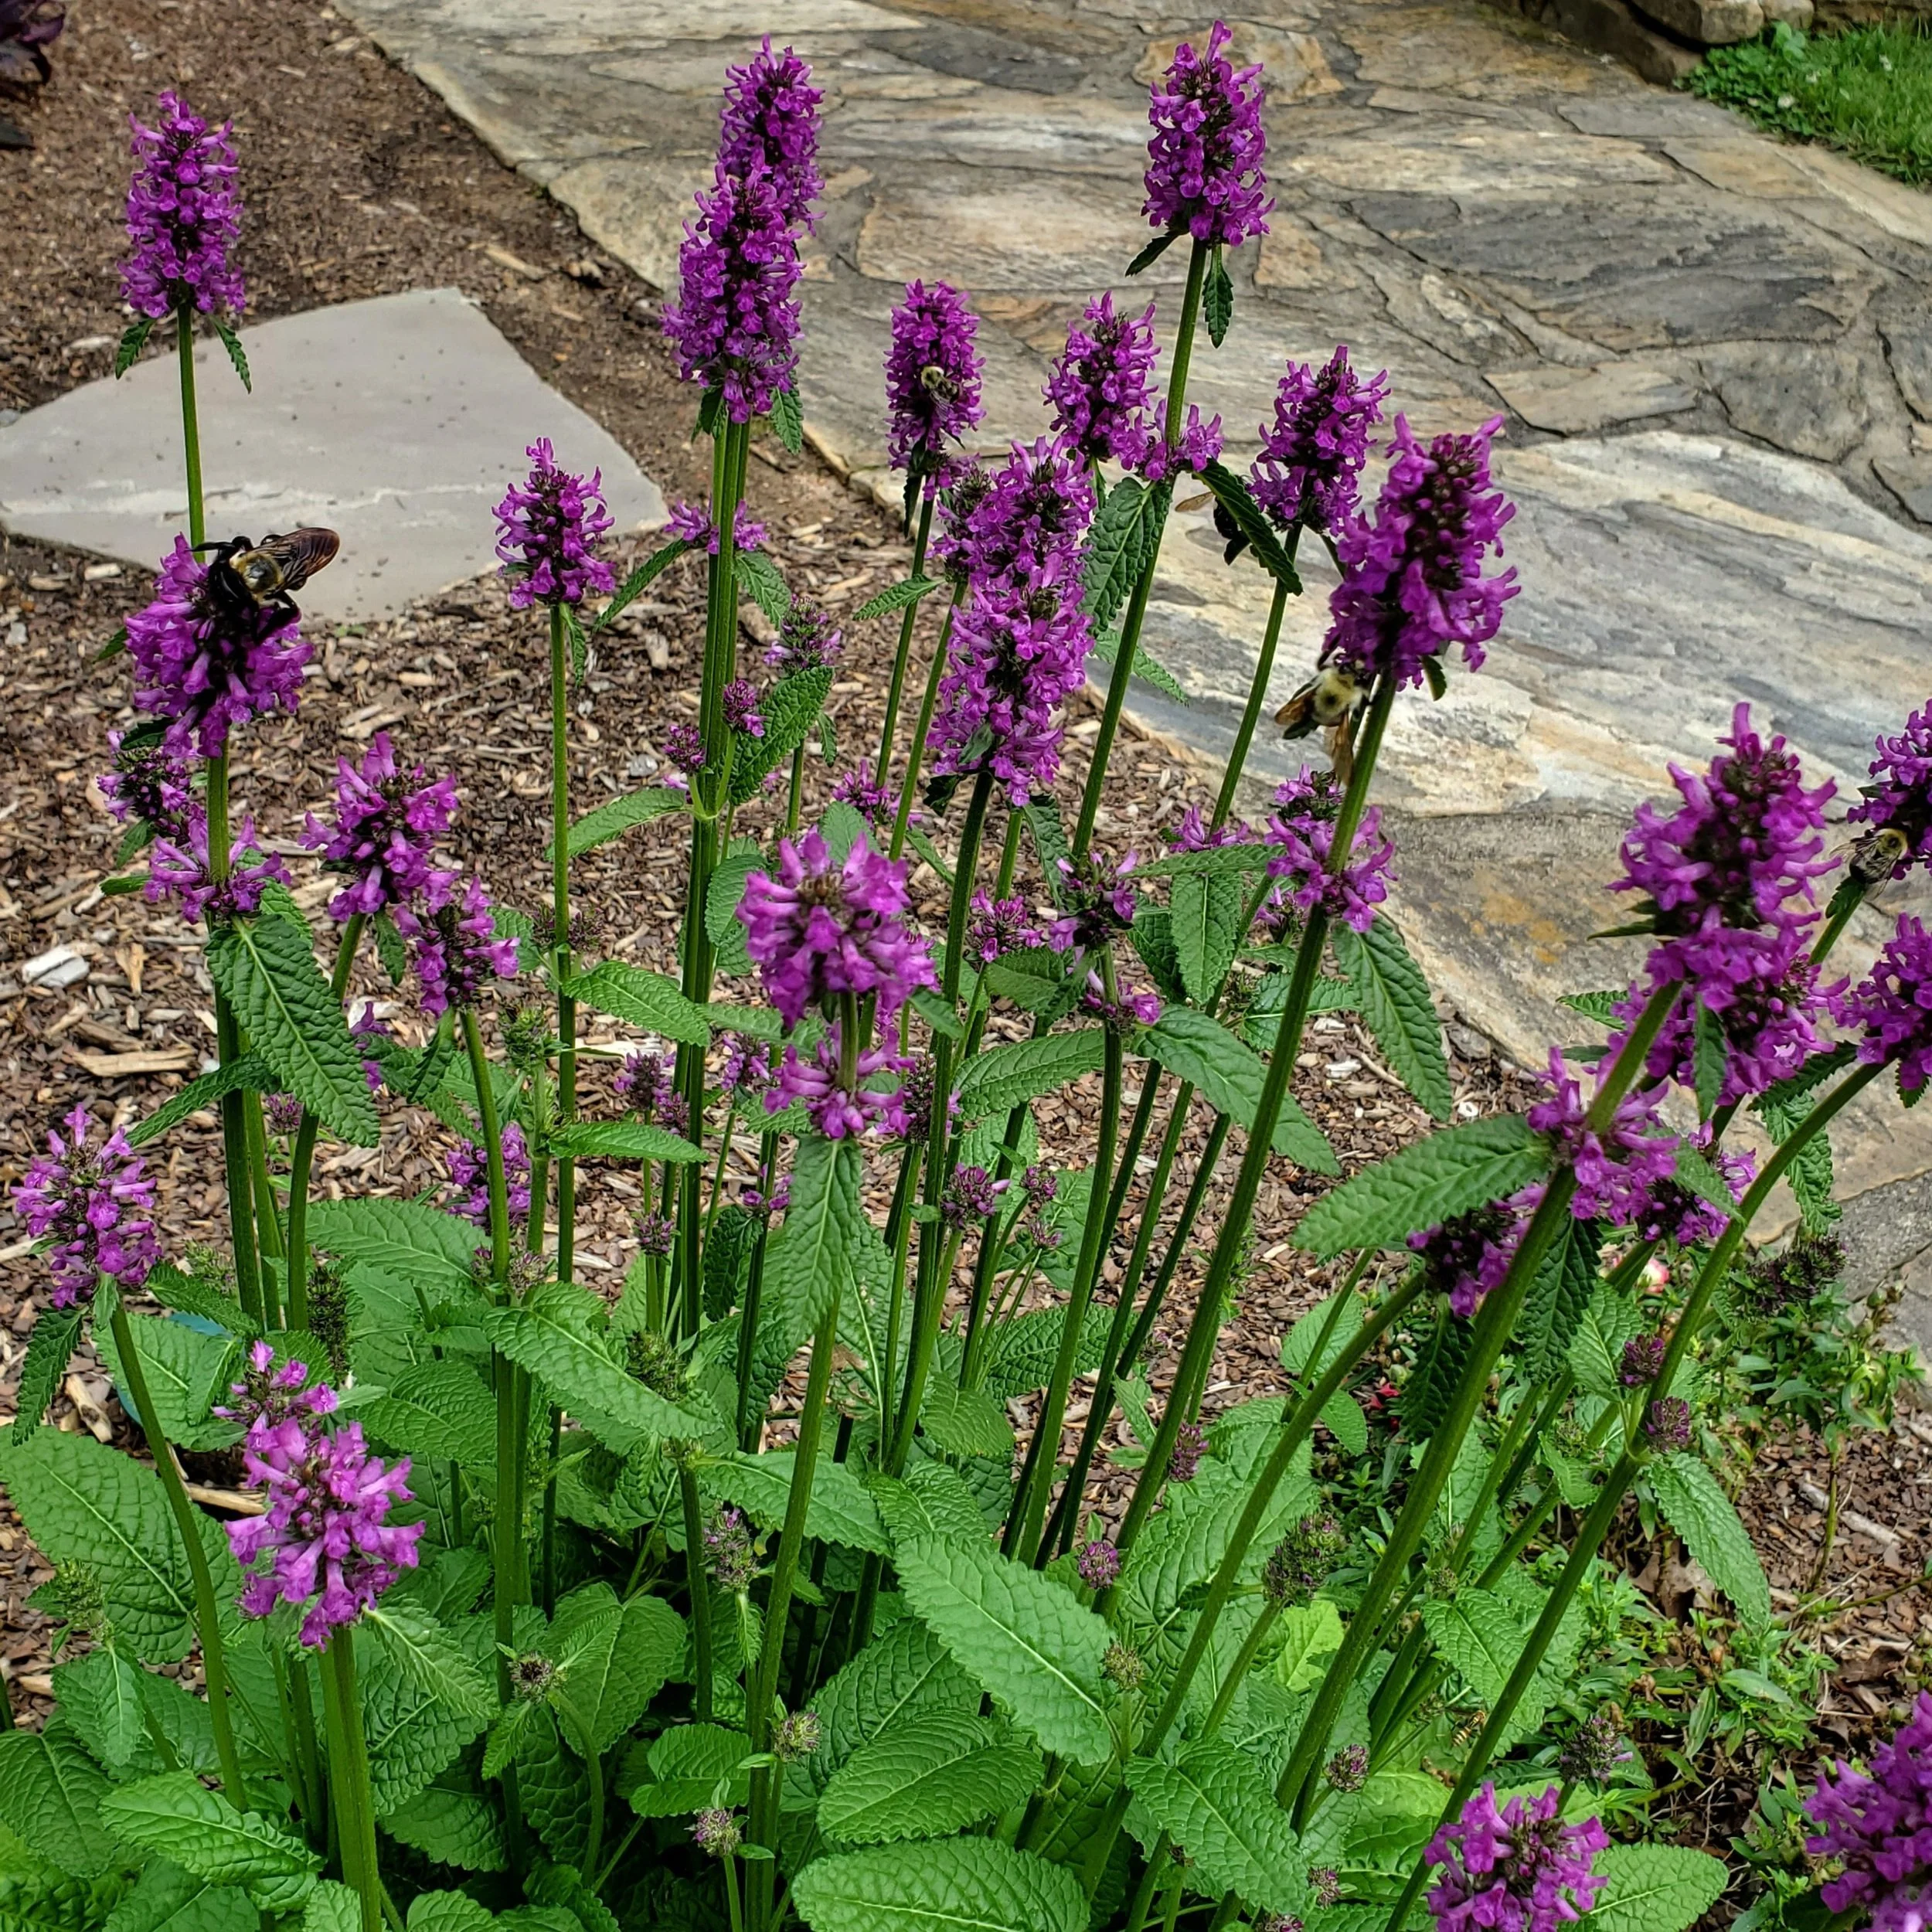
Betony has been labeled as Stachys officinalis or Stachys monieri. The updated, correct name is Betonica officinalis, pronounced beh-TOH-ni-kah oh-fi-si-NAH-liss. The cultivar ‘Hummelo’ was named 2019 plant of the year by the Perennial Plant Association. In upstate SC, ‘Hummelo’ is evergreen although it looks pretty ratty during the worst winter months. All is forgiven when it bursts into bloom in early spring and continues for months. The purple flowers are arranged around leafless square stems in whorls, with a naked internode between the large top cluster and the smaller one below it. If the dead flower stems are removed, Betony will continue to produce flowers until frost.

Flower stems rise above a mound of leaves clustered near the ground. The flowers produce plentiful nectar and pollen. They are a bumblebee favorite in my garden. The textured leaves are a bright green tinged with yellow, making a nice contrast to the purple flowers. Mature plants will reach a height and spread of two feet.

The square stem reveals that Betony is a mint relative. I was cautious when I planted it in my foundation beds, poised to remove if it became too enthusiastic. While Betony does spread, it is not an aggressive or invasive spreader like mint. It is cold hardy in zones 4 – 8. It is tolerant of most soil structures, but prefers a neutral to acidic site and full sun to partial sun. Established plants are drought tolerant. Betony makes an effective edging plant for beds, and belongs in pollinator gardens, poolside gardens, and in containers.

Betony is troubled by few diseases or insects, but snails or slugs can leave leaf edges tattered. An iron phosphate product like Sluggo will control them without negative impact on pollinators, pets, or wildlife.

Bumblebees are enjoying this clump of Betonica officinalis ‘Hummelo’

Rambunctious Burnweed

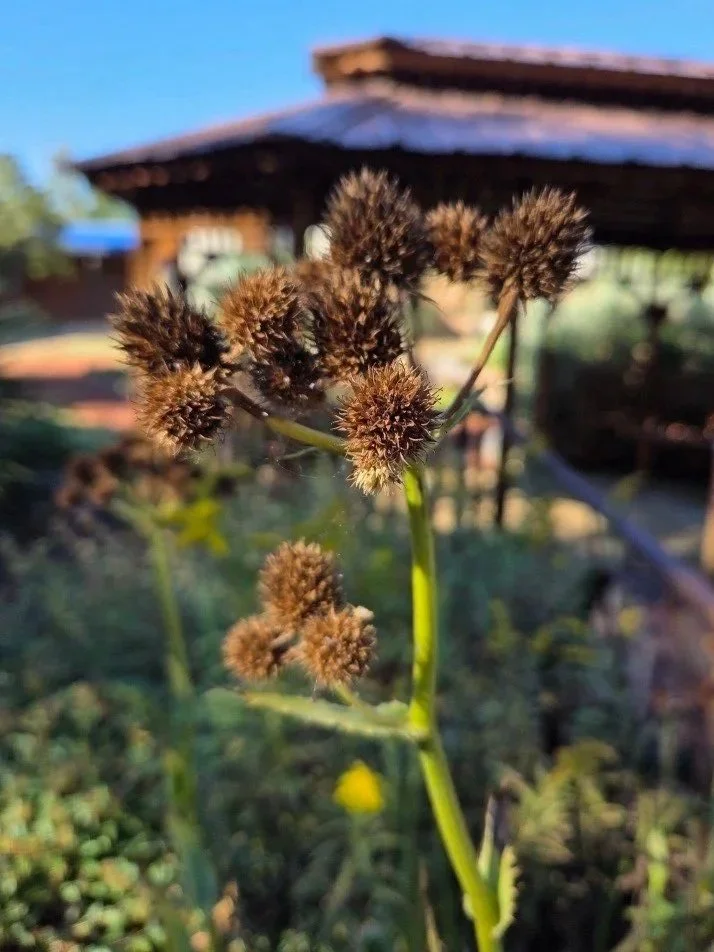
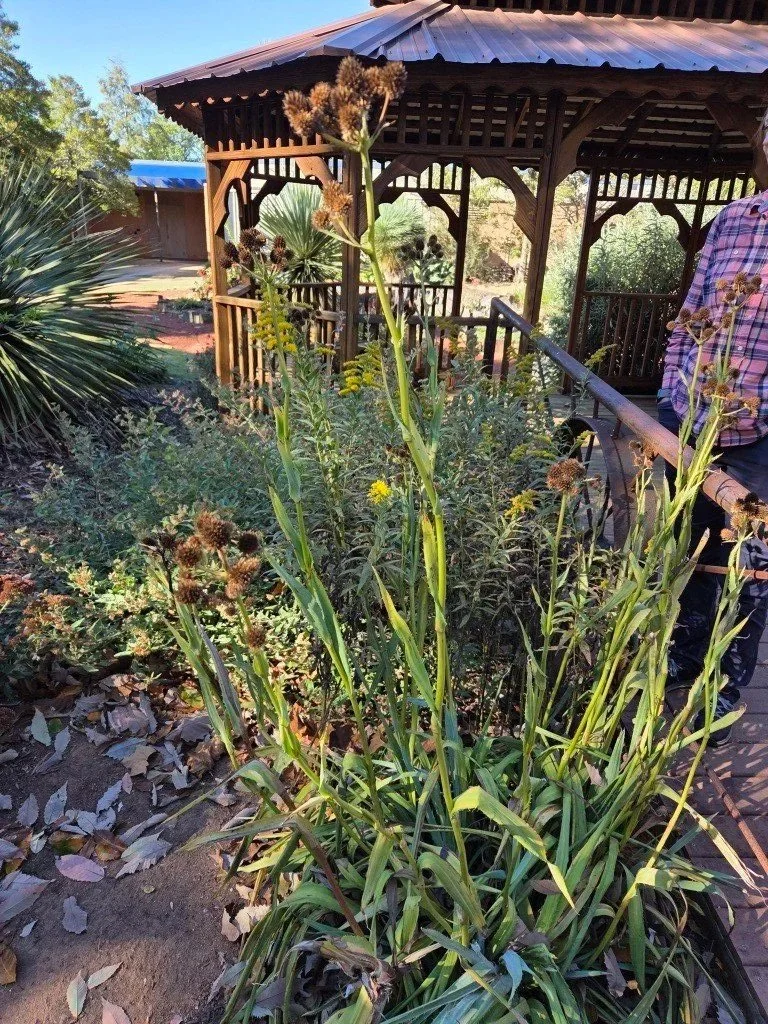
I have received a number of requests to identify a weed that seems to have appeared overnight in almost everyone’s garden. In reality, these have been present but they grow so rapidly that they are now capturing attention. Take a look at the accompanying photo. This is American Burnweed. Burnweed is an early succession plant, which means it is one of the first to move into areas where soils have been disturbed, either through cultivation, wildfires, flooding, or nature-caused chaos.

Burnweed is native to the US, but it is found across the world in most temperate climates. Genetically, it is in the Asteraceae family. Its correct Latin name is Erechtites hieraciifolius, which I can neither pronounce or spell without help.

The leaves of Burnweed are edible, cooked or raw, but not tasty. It poses no danger to pets and can be fed to rabbits or livestock. In the past, Burnweed has been used medicinally for treatment of conditions ranging from digestive upset to skin conditions to hemorrhoids. Long ago, it was processed to produce a blue dye for cloth. Pollinators enjoy nectar from the flowers. Burnweed also absorbs nitrogen from the air and deposits it in the soil, effectively acting as an air cleanser and natural fertilizer. While all these traits sound positive (with apologies to the Natives Only crowd), Burnweed has high potential for invasiveness. It reseeds like mad. Its yellow daisy-like flowers produce seeds with silk tails, similar to dandelion or thistle. The silken tails float on air, enabling the seeds to travel long distances where they fall to the ground and sprout into new plants. Burnweed grows so aggressively that it can choke out other plants by stealing their sun and water.

It is an entirely personal decision whether you choose to remove Burnweed from your garden, keep just a few plants, or grow a forest. They are shallow rooted, and easy to pull up, even when they have gained size. They can grow up to ten feet tall but are narrow in width. Burnweed is an annual, dying with the first hard freeze. If you feel the need to restrain them, you can hand-pull plants now or wait for spring to remove small seedlings.

Help Your Garden Survive a Heatwave

The southeastern US has been melting under a heatwave over the past weeks. Last month, I provided some recommendations to help you select heat tolerant plants for next year. But what can you do here and now to protect your current garden from turning into a crispy frizzle? There is one big DO and two DON’Ts.

Water is the number one thing you can apply to save your garden. I have always heard that watering should be done early in the day to reduce evaporation and to discourage disease by avoiding wet foliage overnight. This is manageable if you have an irrigation system, but many of us do not. And if you have a job with work hours that take you away from home in the morning, it is difficult to find available early time to give everything a good soak. In that case, water when you are able. The earlier in the evening, the better. Soaker hoses apply water at ground level, while overhead sprinklers’ efficiency is reduced by increased evaporation. For plants that are prone to mildew (Zinnias and Bee Balms, for instance), I am careful to water the soil and not the plant. Broadleaf plants like Rhododendrons and Gardenias seem to appreciate their leaves getting a shower.

This year, I have seen major infestations of spider mites. Using a sharp stream of water to knock out their webs will reduce their numbers. Aphids can also be dislodged by a stream of water.

Deep irrigation takes more time but is far better for plants than the frequent application of light amounts of water. No matter how much water the gardener applies, nothing beats a natural rain shower, but thunderstorms drop water in heavy, concentrated bursts that results in run off instead of soaking into the soil.

And now for the don’ts: During a heatwave, restrict pruning to the removal of spent flower heads and damaged limbs. Wait for the heat to abate before doing significant cutbacks. This is also not a good time to fertilize. Drought-stressed plants cannot take up nutrients. Pushing a plant into a growth spurt without the application of plentiful water is damaging to the plant.

As a last resort, erect a temporary screen to shade plants from the harshest, mid-day to afternoon sun. Newly installed plants or those with a lot of tender new growth are most prone to leaf scorch. Cardboard or cloth supported by stick or stake pushed into the ground can serve as a makeshift plant parasol. Remove these as soon as soon as the heatwave passes or bear the scorn of the neighbors.

Take care of yourself in the heat, too. Sunscreen and a hat can go a long way towards protecting you from painful sun damage. When the heat index goes above 100, catch up on indoor reading garden magazines and seed catalogs. Pay attention to plant descriptions that include the words heat tolerant and drought tolerant for improved success next year.

Subtle But Stellar: Sacred Lily, Rhodea Japonica

Cast Iron Plant, Aspidistra elatior, fills the gardener’s need for an evergreen, vertical plant that will survive in dry shade. Sometimes, though, the long leaves of Cast Iron plants can suffer wind damage and look downright tattered. If you have shady site with neutral to slightly acidic soil, consider Rohdea japonica as a worthy alternative. Rhodea’s leaves are thicker, broader (2-3 inches) and only reach lengths up to 18 inches, making them less vulnerable to wind damage.

Rhodea japonica, pronounced ROH-dee-uh juh-PON-ih-kuh, is also known as Sacred Lily or Nippon Lily. It is in the asparagus family. It is native to Japan and China, and will grow in North America zones 6 – 10. It is prized in Asian cultures, where it is considered an emblem of good luck. It is frequently given as a housewarming present to new homeowners. There are over 600 cultivars registered in Japan. In the US, there are a handful of cultivars available. Some have variegated leaf edges which others sport yellow or white freckles. It could even be mistaken for a variety of Mother-In-Law’s Tongue or Snake Plant.

Plant Delights Nursery in Raleigh, NC offers an excellent selection via mail order. In 2022, the PD catalog said, Considered a good fortune plant in China and Japan, Rohdeas have been cultivated for at least 500 years. In Japan they are treated like an herbaceous bonsai - they are grown in special pots called "nishiki bachi." The variegated and twisted forms of Rohdea japonica often command prices of $1,000 to $10,000 per division. Because Rohdea plants are slow to multiply and have been a perpetual failure in tissue culture, you can be sure they will never be found at mass merchants.

Rhodea is not a bright plant that grabs the attention of passersby. A peek near the plant base reveals a strange looking flower that resembles (to me) the spadix of a Caladium. These pale tan or greenish flower stalks are pollinated by slugs or snails. They produce red or orange berries in fall that persist through winter. Seen against the thick, dark green leaves, the bright berries are beautiful.

Rhodea is rarely bothered by disease, insects, or deer. They look best when planted in groups and can be used as an edger or in the dry shade under trees. In my garden, Rhodea shares a container with a miniature Hosta and an airy fern. This pairing gives great foliage contrasts. Rhodea carries the container through winter while the fern and the Hosta are dormant.

Rhodeas are slow to multiply. They can be divided to increase numbers or started from seed. The latter is recommended only for gardeners with a greenhouse and abundant patience.

Rhodea japonica ‘Marginata’ Photo by Krzysztof Ziarnek, Kenraiz, CC BY-SA 4.0 <https://creativecommons.org/licenses/by-sa/4.0>, via Wikimedia Commons

Rhodea flower stalk. Photo by Alpsdake, CC BY-SA 4.0 <https://creativecommons.org/licenses/by-sa/4.0>, via Wikimedia Commons

Rhodea berries. Photo Cathy Dewitt CC BY-NC 4.0

Heat Survivors

A record-breaking heatwave is punishing the southeastern US right now. Yesterday’s heat index in my area was 105 and today is projected to feel like 107. At these temperatures, gardeners and their plants both wilt after 9am. I walked around the garden last evening before sundown, and made note of those annuals and perennials that seemed no worse for their exposure to Nature’s furnace blast.

 I am including photos of several of these stalwart survivors in the Snoddy garden. No weeding or deadheading has been done due to the heat.

Here is a list of heat survivors, in no particular order:

  • Butterfly bush, Buddleia davidii (I grow the dwarf, sterile variety)

  • Spider flower, Cleome hassleriana (tall, fragrant, attracts evening moths)

  • Cosmos (easy annual, perfect for a child’s first garden)

  • Coneflower, Echinacea purpurea (butterfly magnet)

  • Blanketflower, Gaillardia

  • Gomphrena, a personal favorite annual

  • Lantana camara (another butterfly magnet)

  • Four O’Clocks, Mirabilis jalapa (opens at night, fragrant)

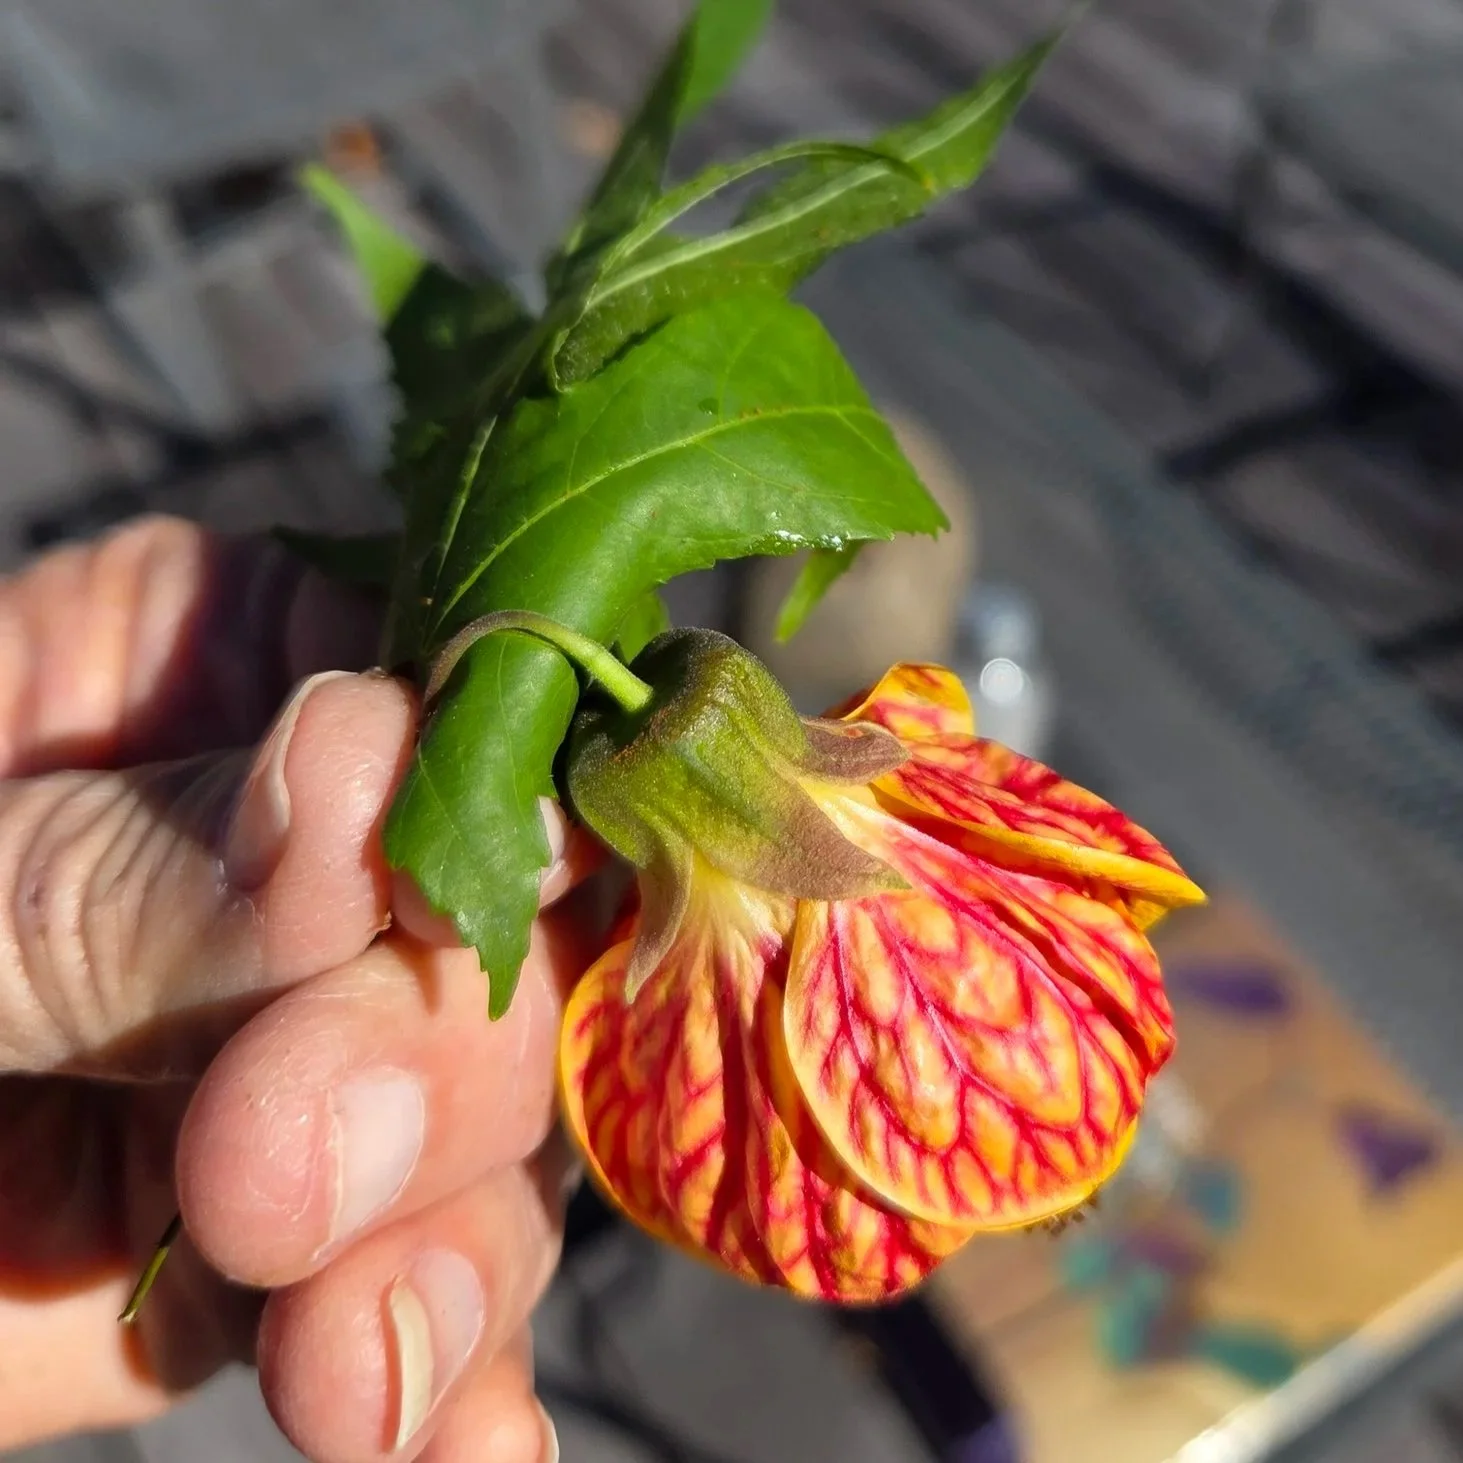
  • Turk’s Turban, Malvaviscus

  • Brown-eyed Susans, Rudbeckia triloba

  • Purple Heart, Tradescantia

  • Melampodium, another personal favorite annual

  • Butterfly Weed, Asclepias tuberosa (host plant for Monarch butterfly larva)

  • Shasta Daisy, Leucanthemum superbum

  • Goldenrod, Solidago (native, favorite of pollinators)

  • Wormwood, Artemisia ‘Powis Castle’ (repels deer)

  • Bee Balm, Monarda (deer resistant)

 When you plan for next year’s garden, consult this list and include at least a few to help your flower beds survive heat waves.

Blanket flower (Gaillardia), Zinnia, yellow Melampodium, purple Gomphrena, yellow Goldenrod, dwarf Red Hot Poker

Purple Coneflower, Echinacea

Clockwise: Daylilies, Red Hot Poker, new Puppy, Zinnia, Butterfly Bush, Artemisia, Purple Heart

Butterfly Weed, Asclepias tuberosa

Clockwise from top: Goldenrod, Red Hot Poker ‘Poco Red”, Melampodium, Gomphrena

Brown-eyed Susan, Rudbeckia triloba

Salmon Four O’Clocks, Mirabilis jalapa, next to Incrediball smooth Hydrangea. Forgive the insect damage - I don’t use insecticides on pollinator plants.

Lantana ‘Santana’ looks pretty even when it is not blooming.

An Exotic Addition To My Garden

Creating beautiful flower gardens is satisfying, but part of me is thrilled when I grow something edible. This is the genetic result of my grandparents’ farming background, I suppose. Two years ago, I spotted a beautiful small tree in the most unlikely of places: the parking lot of a rundown gas/convenience store. The tree was tropical in appearance, but remained evergreen and was even flowering in December. I now know that it was Eriobotrya japonica (pronounced er-ee-oh-boh-TRY-ah jah-PON-ih-kah). The common name is easier to say and spell, Loquat (low-kwaht).

Several times I took a few branch-tip cuttings from that tree, but was never successful with propagating it. Last fall, an unexpected opportunity came my way. I enrolled in a horticulture class at a nearby community college. It was a wonderful learning opportunity, and I enjoyed every minute of the lectures and the walks about campus. One of those walks revealed a beautiful Loquat tree in the protected space between two buildings. Underneath the tree’s canopy stood a single seedling, almost three inches tall. Having secured permission from the instructor, I used a pencil to dig it carefully out of the soil, then wrapped it in a foil wrapper that I had stashed in my pocket after eating a granola bar for lunch. I carefully transported this tiny little gem to my car and to my home. It spent the winter in my greenhouse, safely secured in a 4-inch container of potting soil. Although it didn’t show much top growth, a quick check in early March revealed a pot full of healthy roots. I placed it into a larger container and gave it more love, water, and fertilizer. The plant repaid my attention with rapid growth.

There is a story behind the mother tree. The college instructor, Dr. Kevin Parris, is known worldwide for his research and breeding of Magnolias. On a trip to Asia years ago, he ate Loquat fruit from a roadside stand in China, somewhere near Kunming. He pocketed the seeds. With permission, he brought seeds back to the US. The mature tree on campus was a result of one of the four seeds he sprouted.

A potted, mature Loquat. Photo by Salicyna CC BY-SA 3.0

Mature Loquat fruit. Photo by gailhampshire CC BY 2.0

My garden in located in zone 8a, the coolest part of the possible zones for Loquat. They are only cold-hardy down to ten degrees. I prefer in-ground gardening to containers, but decided to grow my Loquat in a pot that could be transported via hand truck to the greenhouse each winter. A mature Loquat tree can reach up to 25 feet tall, but I plan to prune this one to a “standard” shape (like a lollypop) and keep it to 6 feet or less.

Loquats are not selective about soil structure or acidity. They will grow in full sun or part shade. The small, fragrant white flowers are held in panicles that open in fall or winter. They attract hummingbirds, so I have located the container near my pool deck. Our winter temperatures rarely allow fruit formation outdoors, but I am hopeful that the greenhouse winter home may give me a few. Fruits have a flavor similar to apple but with a softer texture. Another common name is Japanese Plum. Deer do not normally damage this plant.
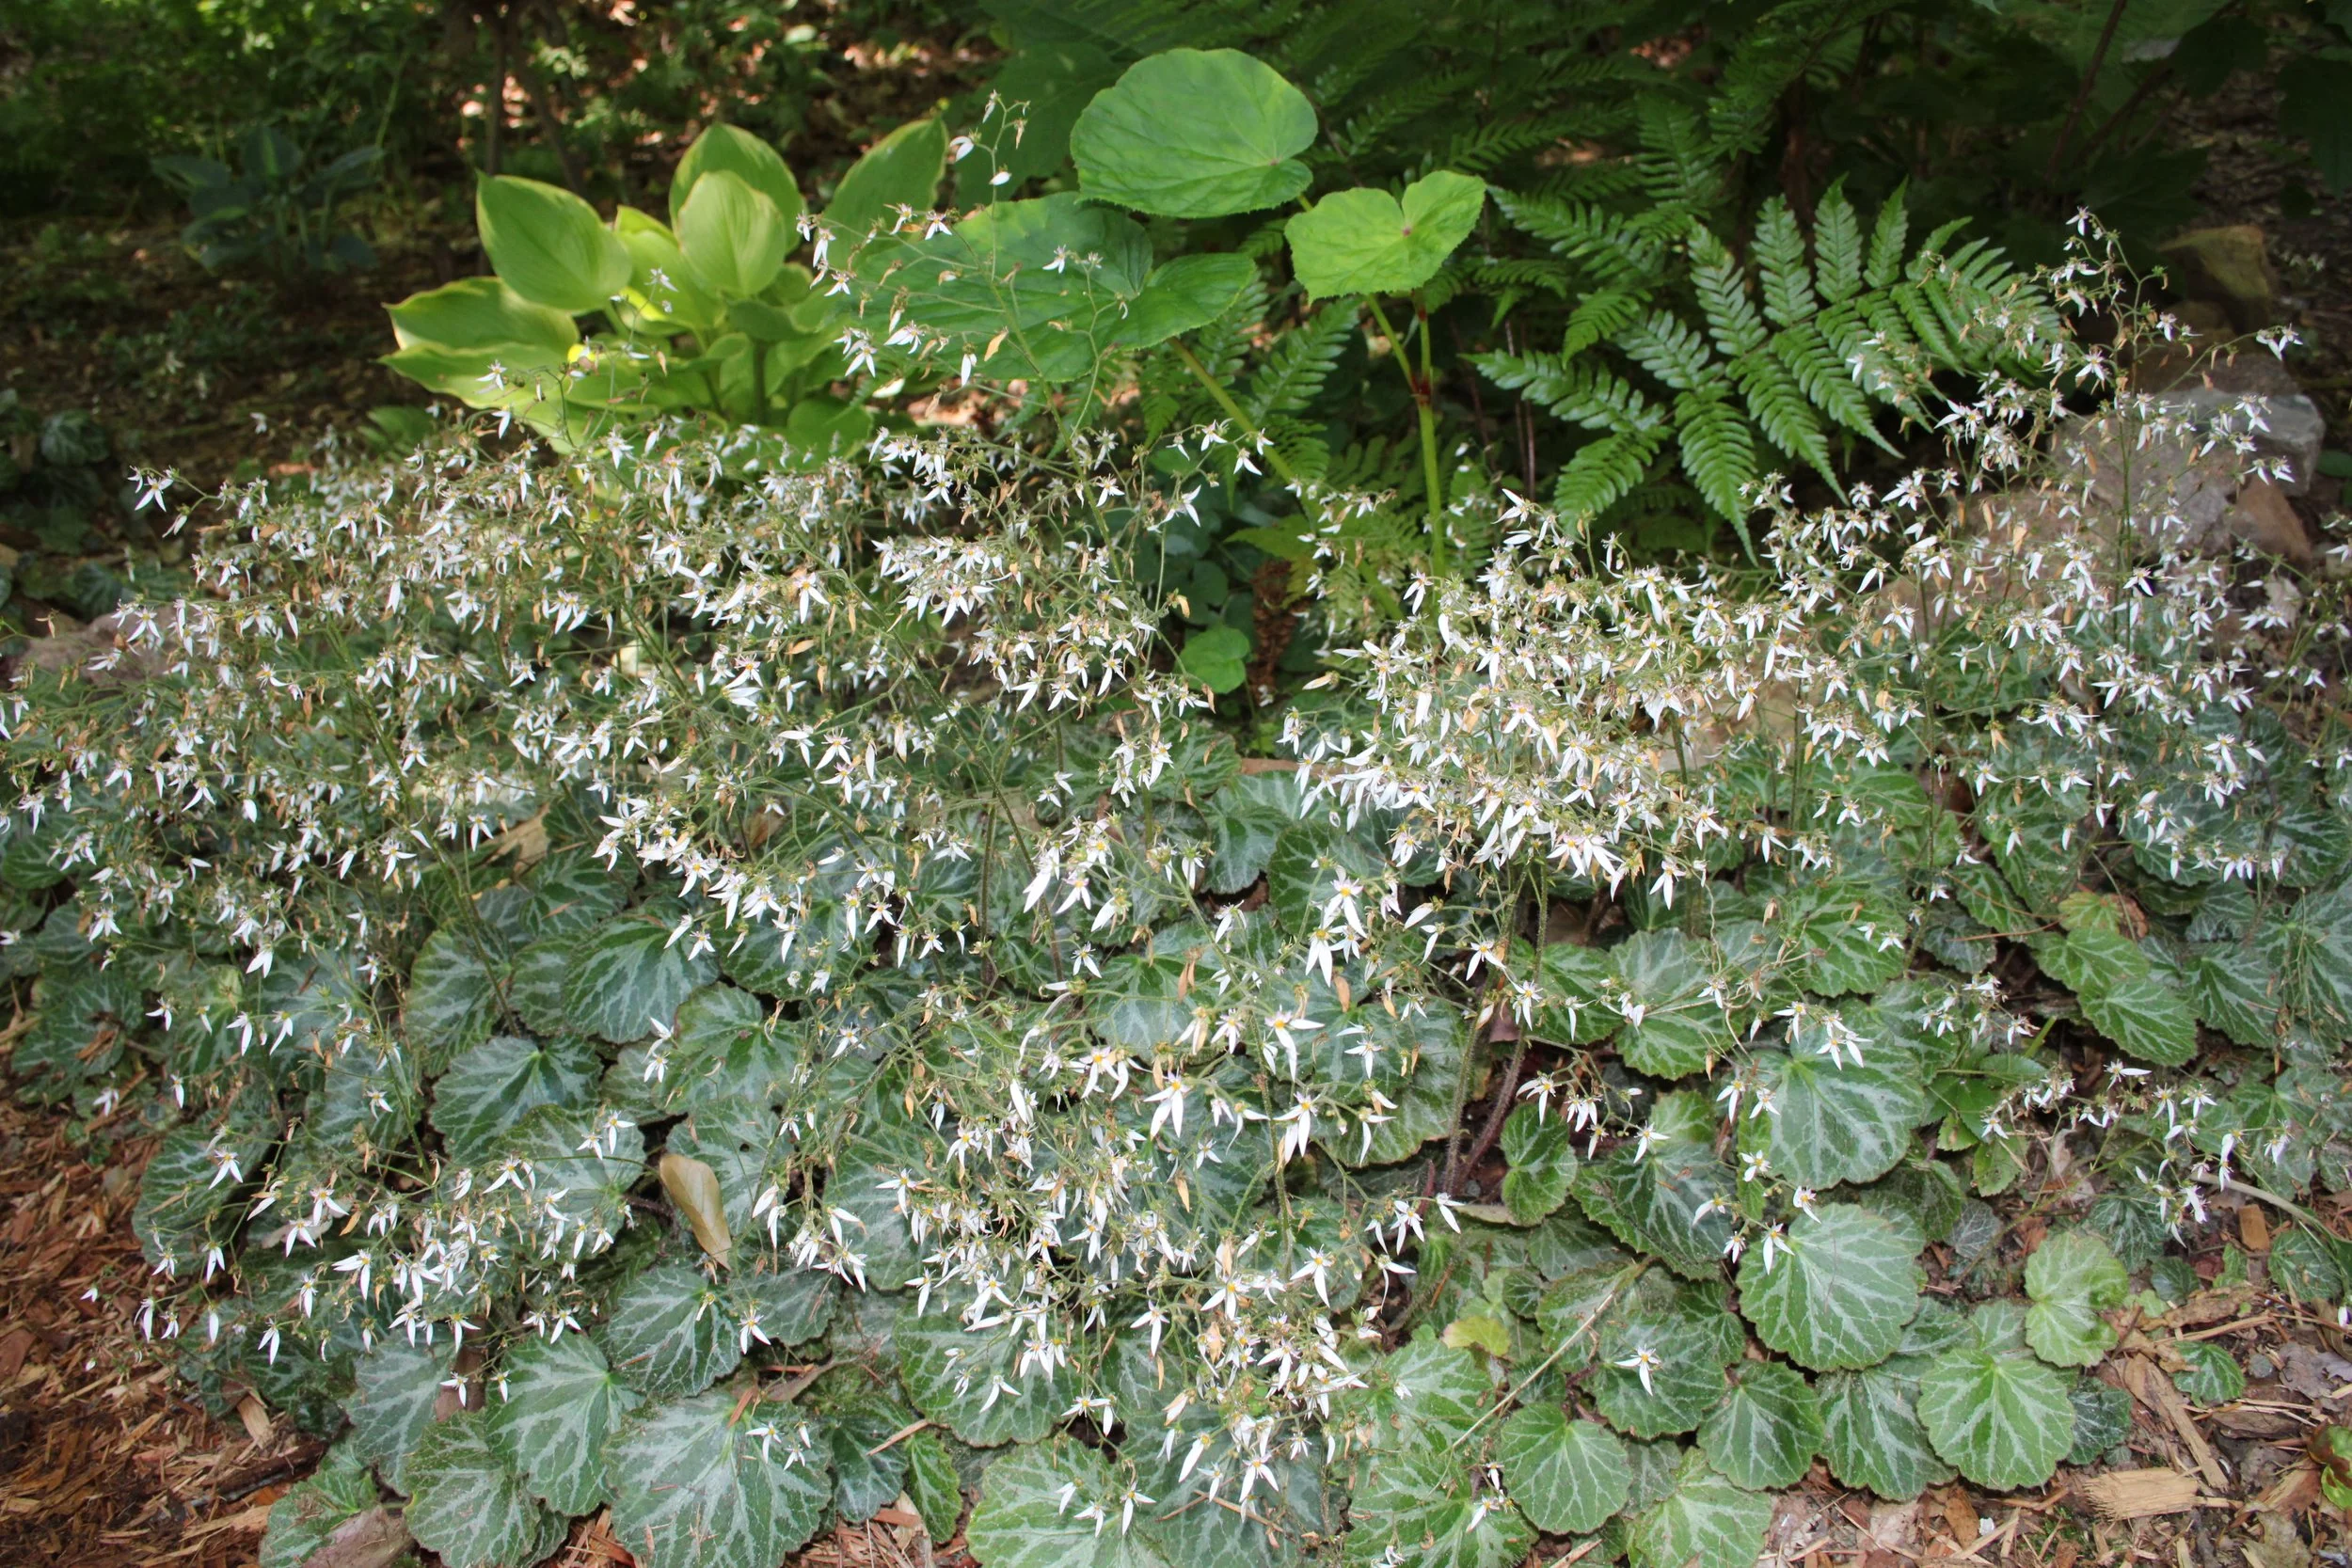
As an addition to the above information, I wanted to share my planting procedure. For my home’s windy hilltop location, I choose large, glazed containers. The size means they don’t blow over so easily and the glazed surface reduces water loss. A large container, however, takes a lot of potting soil. A friend of mine recently recommended the use of several empty water bottles (with cap on) in the bottom of large containers to reduce the soil need.

Here is the newly potted Loquat, ready to flourish. It is planted on a slight rise to help me wedge a hand truck under it for transport to the greenhouse for overwintering. I’m expecting great things from this little tree!

Chitalpa, An Improved Version of an Old Hybrid

I occasionally splurge and buy intriguing plants for which I have no intended location in my garden. Such is the case with El Niño® Desert Orchid, an intergeneric cross between Southern Catalpa (Catalpa bignonioides) and Desert Willow (Chilopsis linearis). Normally, I avoid horticultural Frankensteins because several years ago I blew the majority of my seasonal budget on Echibeckia, a breeding mashup between Echinacea and Rudbeckia. I had always succeeded with Coneflowers and Black Eyed Susans, so I thought this newcomer was a gardener’s dream. Alas, my plants all failed to thrive (translation: they died during their first season). Desert Orchid convinced me to take another risk.

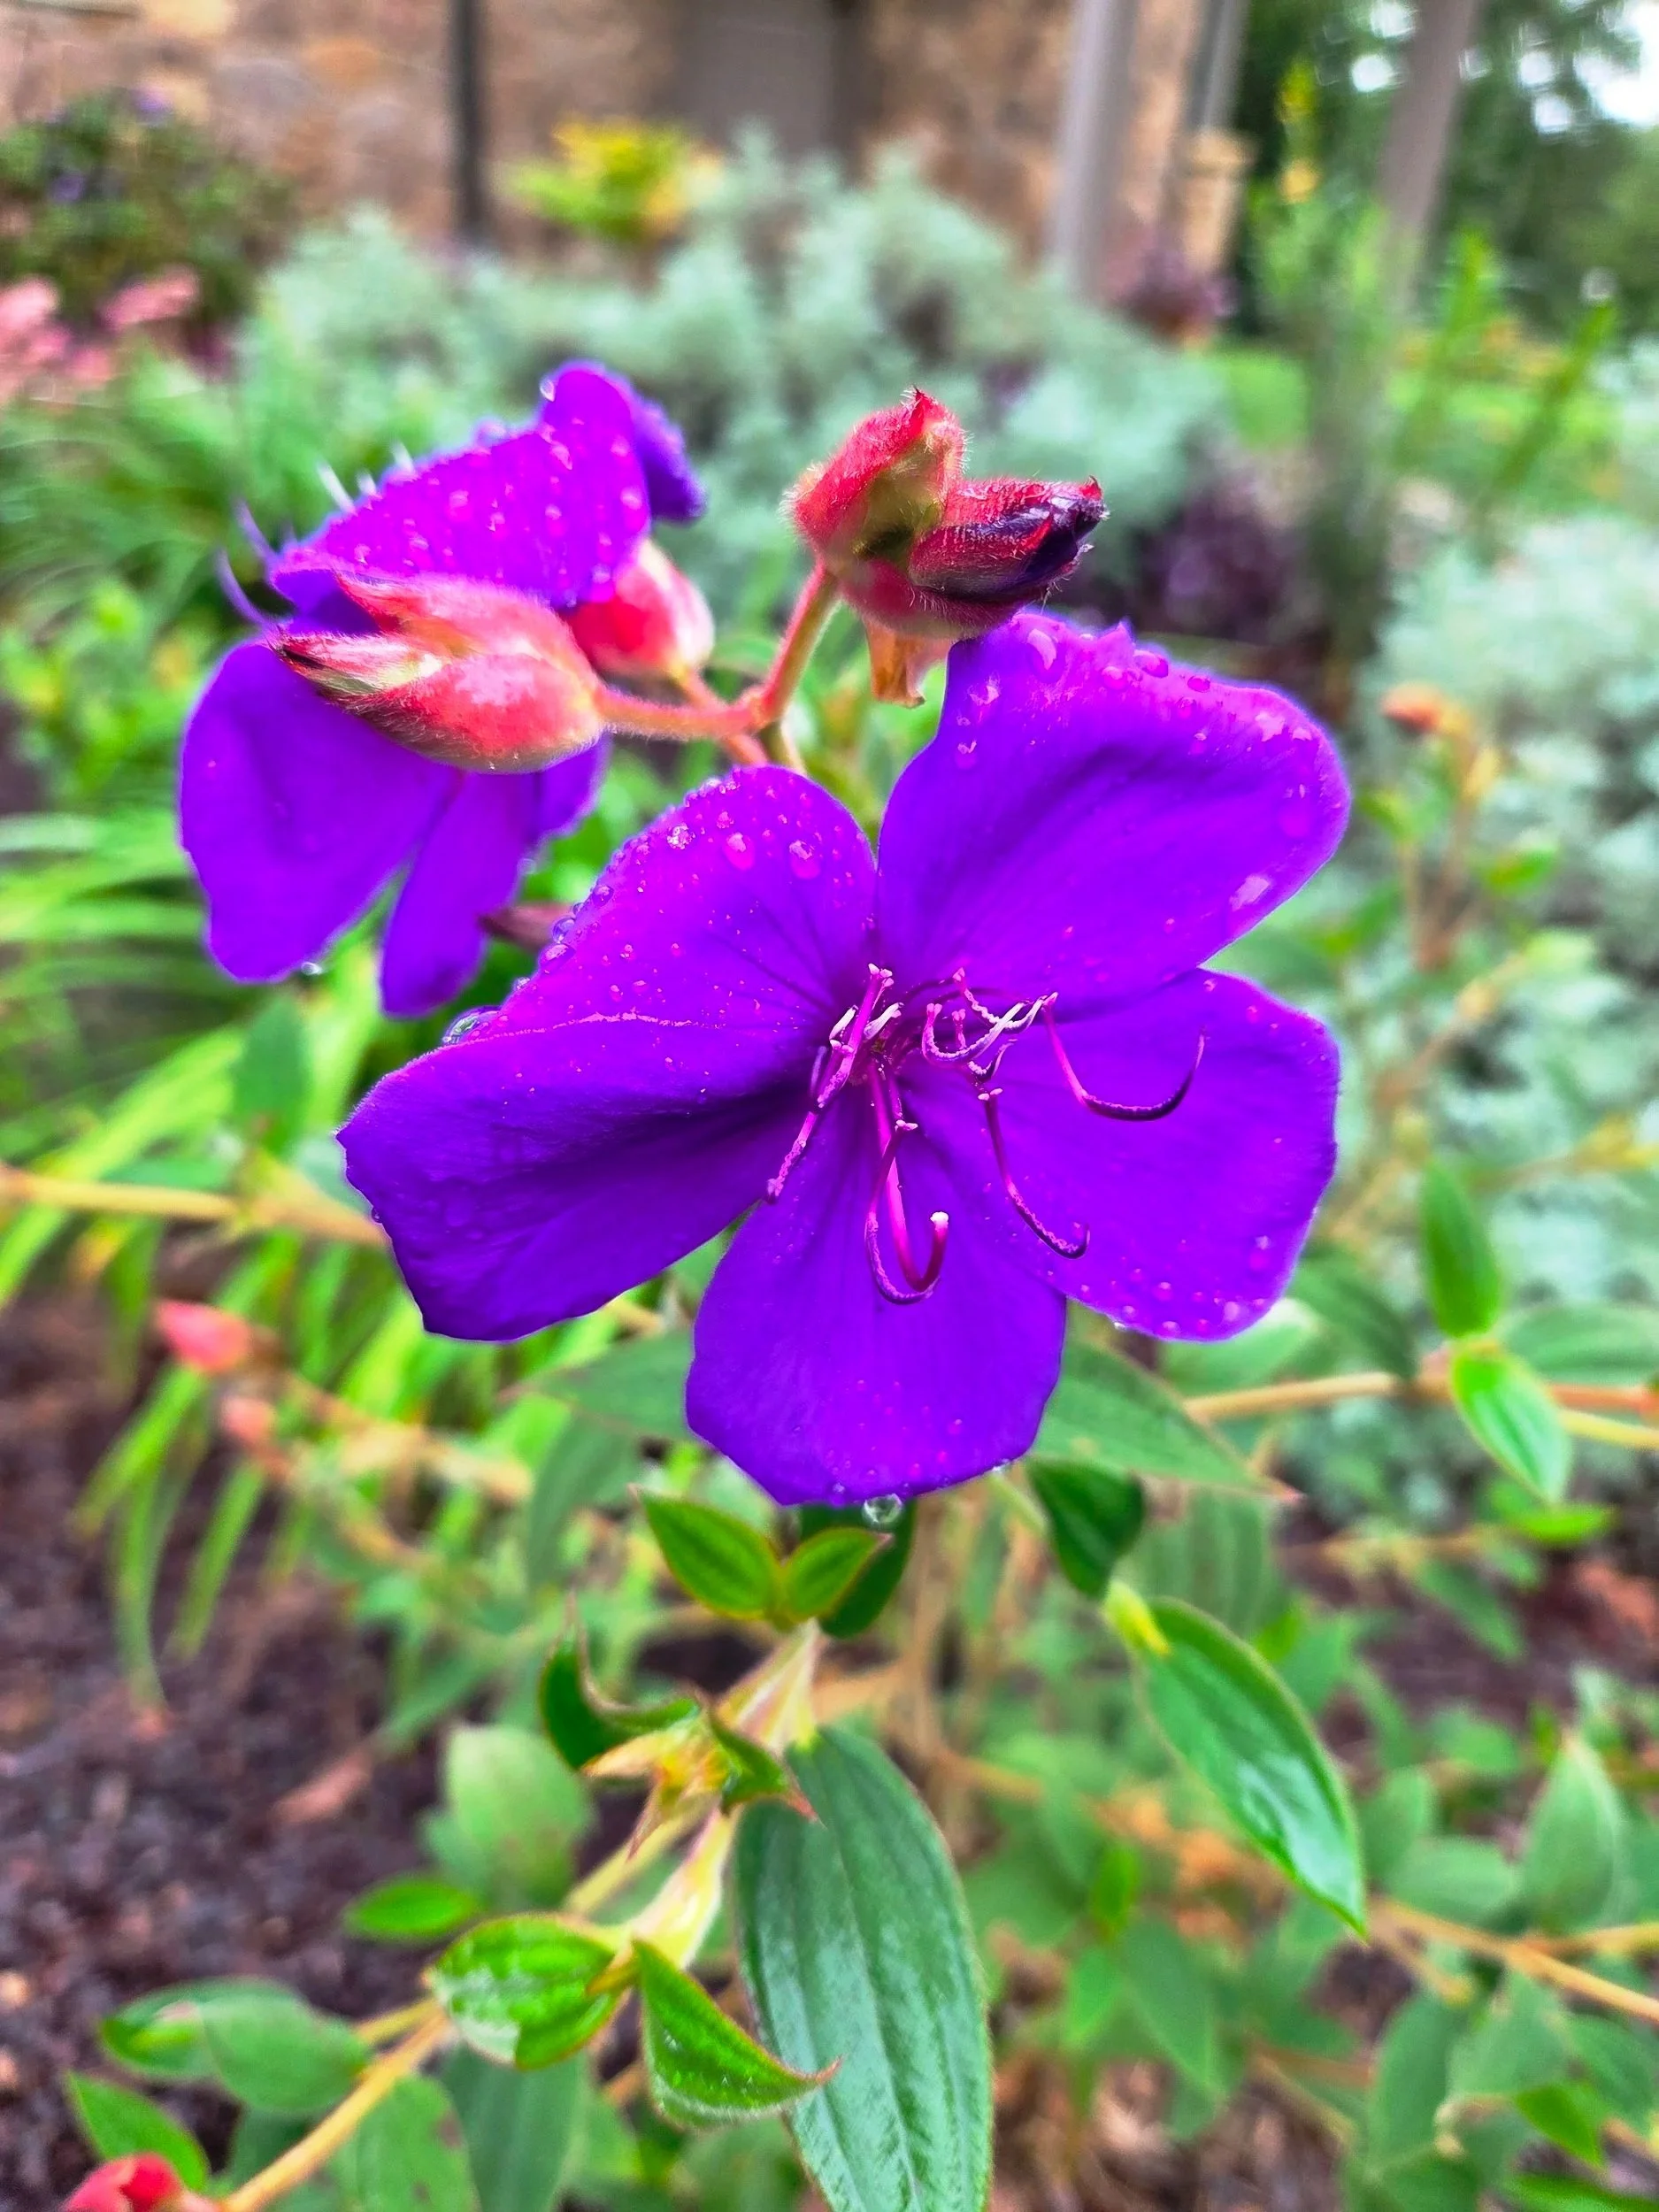
The pink-to-purple flowers of the Desert Orchid make me think of a love child between snapdragon and orchid. The fuzzy throats add to the beauty. Fragrance is an added bonus. Plants are deciduous, hardy in zones 6-9, long-flowering, heat and drought tolerant, and deer resistant. The label indicated a mature size of 15-20 feet tall and 10 feet wide. I purchased three last fall, each in a 2-gallon container. I planted them in well drained soil and  full sun, and hoped that they would survive. They lasted through their first winter and have already almost tripled in size. I am not certain that mine will show blooms during their first year but they should flower heavily next spring and then intermittently through the rest of the summer.
As I researched the Desert Orchid, I ran across an article in Fine Gardening MagazineIssue 223 that explained that this intergeneric cross is nothing new. It was first accomplished in the 1960’s but the results were disappointing. Plants were often plagued by mildew. In the 2000’s, North Carolina State University Mountain Crop Improvement Lab resurrected the plant cross, with the intent of improving the end result. Much work and selection continued until 2023, when El Nino™ was declared the best. It was named Plant of the Month (September, 2024) by the University of California Agricultural and Natural Resources.

The growers say that El Nino will flower on new growth, so I plan to cut it back hard in winter and fertilize gently in the spring. This should result in plenty of new growth for the best flowering, and the cutback will keep the plant to shrub-size instead of tree-size.

The accompanying photographs are from the Proven Winners website, https://www.provenwinners.com/plants/chitalpa/el-ni-o-desert-orchid-chitalpa. The trademarked name is El Niño® Chitalpa   'NCXC1' USPP 35,880.

A Verbena For Every Garden

Verbena (pronounced ver-BEE-nah) is a popular garden plant due to its ease of growth, low maintenance, and heat tolerance. There are more than 250 species. Most grown in home gardens are hybrids, Verbena x hybrida.  A long-time favorite cultivar is ‘Homestead Purple,’ which stands alone as a groundcover or works well as a spiller in a container combination. Other cultivars are available with flowers of pale pink, hot pink, bright red, white, peach, and the occasional bi-color.

Verbena x hybrida has a long blooming period and large flowers consisting of flat-topped clusters of individual florets. Plants are cold-hardy in zones 9 and warmer. Elsewhere they are enjoyed as annuals but may return in cooler zones after a mild winter, especially if planted in a protected area. Hybrids are easy to find in nurseries and big box stores. Plant forms range from tall and thin to low and spreading. The upright forms do well in borders, while the trailing forms make an attractive groundcover or hanging basket. They pair nicely with Summer Snapdragon, Angelonia.

Verbenas enjoy full sun and well-drained soil. Plants are drought tolerant. Do not overwater or roots may rot. Butterflies and other pollinators love the flat flower clusters, while deer rarely nibble them. Verbenas tend to flower at the ends of their stems, so by mid-season plants may have a middle with few or no flowers. Gardeners can prevent this tendency toward legginess with an occasional pruning of a few stems. No deadheading is necessary but removing spent flowers will keep the plants looking neat and will encourage more blooms. Superbena® Verbenas, from Proven Winners™ have been bred to resist the powdery mildew that occasionally plagues older cultivars, with increased drought tolerance.

Verbena bonariensis, commonly called Brazilian Verbena or Verbena on a Stick, is a tall variety that can reach up to four feet or more. Its appearance is markedly different from the flat, spreading form of Verbena x hybrida. Its small lavender flowers are held at the top of long, thin stems while its narrow leaves are clustered near the ground. It is a short-lived perennial, grown as a reseeding annual. It has escaped cultivation and spread across the southeastern states, earning a place on the invasive lists in NC, SC, GA, AL, FL and LA. I grow this one in my pollinator area, and while it does spread around a bit, I would consider it aggressive but not invasive.

Verbena hybrids are good plants for new gardeners. They look wonderful planted in masses.

This newly planted container pairs a hot pink hybrid Verbena with pink Pentas and a pink Euphorbia ‘Shades in Pink.’ This combination will tolerate heat and not demand daily watering except on the hottest of summer days.

This brilliant purple Verbena is ‘Enduro Purple,’ an improvement over the old ‘Homestead Purple’ cultivar. Photo by Jim Robbins, used under CC BY-NC-ND 4.0

Tall “Verbena On A Stick,” Verbena bonariensis.

Walking Iris, Self-Layering Rhizome for Part Sun to Shade

Years ago, I received a Walking Iris as a garden gift from a fellow Master Gardener. It was labeled, Neomarica gracilis. I assumed that it was an ordinary Iris. The giver hesitated to describe it. Not bearded, he said. I expected a flower similar to Siberian or Dutch, or even like Japanese Water Iris, Iris ensata. The first bloom on my plant removed all those misconceptions. The flower was like no other I had ever seen – parts of three, with an unusual brown zebra-striped section in the middle. Each flower lasted only a single day, but every day brought new buds and blooms. Then the magic happened. Walking Iris flowers are held on thin stems. When the flowers are spent, the dying stem flops over onto the ground. The stem tip produces a tiny new plantlet that pushes roots into the soil. Effectively, the Walking Iris air-layers itself into a growing clump, ‘walking’ in all directions. Pretty nifty, right?

Last month, I toured the grounds of a North Carolina gardener. She had a large clump of Walking Iris. The flowers were different from the one I had owned. This called for research.

I learned that the Neomarica genus has been renamed to Trimezia. Common names include Poor Man’s Orchid, Fan Iris, and Apostle Plant. The flower does look like a cross between a Dutch Iris and an Orchid. Like other Iris, the flat leaves are held in loose fans. The Apostle Plant name came from the (incorrect) belief that the rhizome must have twelve leaves before it flowers. [For those of you who did not grow up in a Bible-reading family, Jesus Christ had twelve followers during his life on earth, known as his Apostles.] 

Flower colors of Walking Iris are variable shades of purple, blue, and white depending upon the species and also the sunlight and water they receive, as well as soil fertility. They are hardy in zone 8 to 11, and can be grown as houseplants in cooler zones. They can be grown in full sun to mostly shade, but favor dappled shade for best performance. Plants are evergreen in zones 10-11, but top growth dies to the ground in zones 8-9 winters. They will tolerate heat and mild drought, but prefer consistently moist, acidic soil with monthly light fertilizer applications.

Walking Iris are easy to grow, reaching heights up to 36 inches. They will spread slowly to become large clumps. They are low maintenance, a “plant it and forget it” bulb for woodland gardens, containers, rock gardens, or borders. They are rarely troubled by insects or diseases.


This healthy clump of Walking Iris is flowering mid-April and will continue to bloom intermittently until frost. This part-sun bed is located in zone 7b.

A different color arrangement of Walking Iris.

https://commons.wikimedia.org/wiki/File:Walking_iris.jpg

Weed Rant: Sticky Weed

Gardeners everywhere are removing weeds from their gardens, hoping to control the nasties before they become deep-rooted and tougher, or at least before they set seeds and spread. One weed that I find particularly challenging is Sticky Weed, Galium aparine, pronounced GAL-ee-um ap-AR-in-nee. Other common names for this pest are Sticky Willy, Catchweed Bedstraw, Cleavers, and Velcro Plant.

The common names relating to its stickiness arise from the curved prickles along the length of the four-sided stems. These prickles grab skin, clothing, and other parts of the plant, making it difficult to discard once pulled, almost like a piece of static-filled plastic wrap refusing to be released from one’s hand. Those same prickles prevent the weed from flattening after harvest so it was once used to stuff mattresses, hence the reference to bedstraw.

The stems can grow up to six feet in length but they are so weak that the plant appears as a vine or groundcover. When an attempt is made to pull the plant from our garden beds, it frequently breaks off at ground level, leaving roots to regenerate a replacement plant. Plants are annuals, so removing them before seeds develop will help reduce recurrence. Seeds remain viable a couple of years, even after passing through the digestive tracts of animals. It is possible to spread the weed through use of animal manures if it was present in pastures.

Sticky Weed has a unique appearance because its leaves are whorled around the stems, with long lengths of stem (“internodes”) between the leaf clusters.

Native Sticky Weed grows across most of the US, in all sun exposures except deepest shade. It is not selective as to soil texture. My research on this plant revealed that the white, four-petaled flowers were once used to curdle milk for cheese making (why?) while the seeds can be harvested and roasted as a low-caffeine alternative to coffee (again, why?). The fruits are bristly, allowing them to travel along on pet fur or the gardener’s socks. An individual plant can produce up to 400 seeds. Sticky Weed’s leaves and stems can be eaten raw or cooked. File that away under “things I hope I never need to know.”

Sticky Weed, Galium aparine

The magnified seeds of Sticky Weed, Galium aparine

Wild Garlic Woes

Ugly clumps of wild garlic leaves are marring the dormant zoysia grass around my home garden and the mixed grasses in my pasture. Wild garlic is Allium vineale, a member of the lily family. The strong oniony stench of bruised leaves is anything but lily-like. Mature leaves are 6 to 12 inches in length. Wild onion, Allium canadense, is similar in appearance but wild garlic has round, hollow stems while wild onion has flat leaves that are not hollow. Both these plants are winter perennials that emerge in late fall, grow throughout winter and early spring, then go dormant.

Wild garlic has a teardrop-shaped bulb with a fibrous mat of roots. If allowed to mature, stems will form flowers or bulblets at the top of the stem, resembling chives. Flowers may be pink, white, or lavender. If you decide to mow over the clump, do so before the flowers/bulblets have formed or you risk spreading the misery as seeds are discharged across your lawn.

Wild garlic will grow in any type of soil and any pH. It is both drought tolerant and bog tolerant. It prefers full sun but tolerates shade. It tolerates frosts and hard freezes.

Both wild garlic and wild onion resist eradication attempts. Years ago, I decided to ignore the clumps of wild garlic in my lawn since their appearance was short lived. Mistake! While the top growth is dormant, they are reproducing underground via bulb offsets. Without treatment, they come back larger and stronger from year to year.

“Treatment” can be chemical or manual. I always try to use a non-chemical approach as my first line of defense. Removal is a painstaking chore, best done after a soaking rain has softened the soil. In past years, I used an asparagus/knife weeder which resembles a long-handled screwdriver with a forked tip. My new tool of choice is a hori-hori. It has a wider forked blade that is serrated on one side with a sharp edge on the other. With the hori-hori, I am able to saw through sod and lift the entire clump of garlic bulbs, carefully ferret out the individual bulbs, then replace the lifted sod. The bulbs are further below soil surface than one might expect, so be prepared to dig several inches deep. Use a foam kneeling pad to save wear and tear on the body. Use disposable gloves to avoid stinky garlic hands.

If you choose to go the chemical route (and believe me, I’ve been there!), repeat applications of a nutsedge killer may be effective. In areas outside the lawn, a total vegetation, non-selective killer may be used. Because leaves are waxy, use a surfactant (a soluble product that makes the chemical spray adhere) to ensure lasting contact. Clemson University has an information sheet on best practices. Click HERE to read their information bulletin. There is NO effective pre-emergent herbicide.

While my war against wild garlic is purely for aesthetic reasons, farmers have a more serious concern. Cattle that eat wild garlic will produce garlic-flavored milk (yuck!) and poor-flavored meat. If it is harvested along with cereal grains, wild garlic causes an off flavor and even makes machinery gunk up. Farmers usually battle wild garlic with deep plowing in the fall, burying bulbs so deep underground that they cannot survive. Alternatively, or in addition to deep fall tillage, tilling can be done in the spring while the plants are small – one or two leaves. Simple mowing may weaken the plant, but it appears that frequent decapitation forces the underground bulb to become larger and larger. This is why I recommend hand digging with a tool rather than trying to pull them out. A broken stem leaves the enemy underground, gathering energy to rise again.

Winning The War Against Nutsedge

It’s time to start considering how to fight the horrible garden invader, nutsedge. Today’s guest blog is written by Skip Richter, Horticulturist & Host of GardenLine Radio on KTRH 740. He received his master’s degree in horticulture from Texas A&M University, “the source of all earthly knowledge”, and has served as a county horticulturist with Texas AgriLife Extension for 34 years in Montgomery, Travis, Harris, and Brazos County, advising home gardeners and the green industry on research-based horticultural practices. He has served as the National Gardening Association’s regional horticulturist for the southeastern U.S. and is a contributing editor to Texas Gardener magazine. He was selected as a Regents Service Fellow by the Texas A&M University System Board of Regents.

You can connect with him via:

Website: Gardening with Skip
Instagram:   gardenlinewithskip
Facebook:  GardenLineKTRH
YouTube:   @skiprgarden

Nutsedge (aka “nutgrass”) is not a grass, but rather a member of the sedge family. Listed as the #1 most-troublesome weed in the vegetable, turf and the ornamental categories by the Weed Science Society of America, to know nutsedge is to hate it.

Before we delve into how to control this weed from hell, let’s take a closer look at some important facts about nutsedge. There are two common types of nutsedge: purple nutsedge (Cyperus rotundus) and yellow nutsedge (Cyperus esculentus). They each have key differences that influence which control effort will be effective against them. 

Can’t beat ’em? Eat ’em!

There is a form of yellow nutsedge (known in various parts of the world as chufa, earth-almond and tiger nuts) that’s popular as a snack or mashed food. It is often used to create a sweet, milk-like beverage known as horchata de chufa. The tubers have even been found in Egyptian tombs dating to 3,000 BCE. I think that taking nutsedge with you to the grave is going a bit too far.

I once ordered and grew some chufa nuts (please don’t tell anybody) in my garden to compare them to our regular local yellow nutsedge. They produced tubers that were a bit larger but weren’t very impressive to the palate.

Tubers of our wild yellow nutsedge are also technically edible, with a mild almond-like taste. After chewing awhile, you give up and remove a bit of “sawdust” from your mouth. I’ll note here that edible and palatable are not synonymous. My favorite culinary assessment of yellow nutsedge tubers comes from a National Public Radio story, in which a taste-tester said of nutsedge tubers, “It doesn’t taste terrible.” High praise indeed.

Nutsedge development

Nutsedge often arrives in gardens, lawns and landscapes along with plants, topsoil and/or sod. New plants arise primarily from underground tubers rather than from seeds. Most tubers are found in the top eight inches of soil. But depending on the soil type and the nutsedge species, some tubers will be deeper.

Wet soil conditions wash a substance that inhibits sprouting from the skin of yellow nutsedge tubers, allowing them to sprout. This is one reason why yellow nutsedge proliferates and thrives in wet areas of a lawn or garden.

Nutsedge shoots emerge like pointed missiles from the ground and the leaves emerge from their protective sheath when each shoot reaches sunlight. This protective covering enables them to easily push up through soil or mulch, and even to poke through plastic sheeting and most landscape fabrics when these products are stretched tightly over the soil surface. Once the shoot reaches sunlight and the leaves emerge, and the plant is no longer able to punch through surface coverings.

When a nutsedge shoot reaches sunlight, the plant forms a bulb at its base that produces horizontal underground stems (rhizomes) with new tubers. These tubers can form additional tubers, as well. In one test, a single yellow-nutsedge tuber produced 6,900 tubers by fall and 1,900 daughter plants the following spring. This is one reason this plant is so difficult to control. Diligent efforts to prevent or greatly limit new tuber production are key to controlling nutsedge infestations.

Cultivation and hand-hoeing

Each tuber has approximately seven or more viable buds. So, any attempt at control (such as the ol’ garden hoe) chops off only one shoot; the tuber merely sends up another (after laughing hysterically at the gardener’s efforts). However, tubers expend stored energy to send up new shoots, so prompt removal of new shoots multiple times will weaken tubers and can decrease development of additional tubers.

For hoeing/hand-digging/tillage to be effective, one must remove plants before they have developed more than three-to-five leaves. If left longer, the plants will begin restoring the tuber’s spent reserves. Tubers expend a little over half of their stored energy to develop their first above-ground plant. Therefore, I cannot overstate the importance of constant surveillance and prompt digging or spraying to prevent tubers from replenishing their reserves.

Diligent efforts at frequent cultivation can outlast a tuber’s ability to regrow, but this type of diligent, prompt continual effort is seldom maintained. Control is further complicated by the fact that some dormant tubers are usually present to sprout over time. So, continue to look out for newly emerging nutsedge plants.

Combining control methods

Now that the nutsedge beast sounds impossible to defeat, let me say that it is not invincible. Difficult, yes; but not impossible. You can manage nutsedge, if you use a combination of practices and are consistent with prompt follow-up.

Non-chemical reduction of nutsedge in landscapes and garden beds involves the following practices. While all are not always possible, the more you can do, the better your results will be.
1. Avoid overwatering/saturated soil conditions, which stimulate yellow-nutsedge proliferation.
2. Hand-dig tubers, beginning when the shoots first emerge in spring. If you wait until mid- to late May to begin, you will likely have almost 10 times the number of nutsedge plants you began with. To be effective, repeat-digging is required whenever new plants have developed three-to-five leaves. If you wait longer, the plants will be producing new viable tubers.
3. Rototill the soil to sever rhizomes and bring tubers to the surface, exposing them to dry out. Rake and remove exposed tubers and rhizomes. Sun-drying is more effective against purple nutsedge than yellow nutsedge. Tilling breaks up the underground chain of the tubers on purple-nutsedge rhizomes, causing multiple dormant tubers in the chain to sprout. If you then promptly dig or spray the new sprouts, you can significantly reduce the infestation.
4. Cover future garden beds from spring to fall with a very dense, water-permeable landscape fabric to block out all sunlight. Don’t pull the fabric tightly over the soil surface or else new nutsedge shoots will puncture it. Keep soil moist to promote growth beneath the fabric, which depletes the tuber’s stored reserves.
In a study I conducted in Houston on purple nutsedge, plots were shaded with a loose covering of dense landscape fabric for the summer season. Shaded plots had a 24% decrease in tuber counts, while plots ex-posed to full sun had a 2,400% increase. Also, the 76% of tubers that remained were likely at least weakened, although we did not replant them to check this possibility. While shading won’t eradicate all tubers, it can significantly reduce the number of tubers and can be a helpful part of an organic regimen to manage nutsedge.
5. Solarizing heats the soil and can destroy tubers in the surface few inches. Temperatures over 112 degrees are lethal to tubers. Solarizing won’t destroy tubers deeper into the soil, but if preceded by deep tillage, the effectiveness of solarization can be increased. The clear plastic used in solarizing must be held above the soil surface to prevent it from being punctured.
6. Spray the plants with a systemic product beginning when the first shoots have three-to-five leaves. After the fifth-leaf stage, viable “daughter” plants will be forming on the rhizomes, which will not be effectively controlled by sprays to the original plant. Repeat sprays three-to-four weeks later as new nutsedge plants emerge and have three-to-five leaves.

Organic “top kill” products containing pelargonic acid, ammoniated nonanoate, plant essential oils and acetic acid (vinegar) will kill the weed’s top growth. But they do not do much to control nutsedge, unless accompanied by hand-hoeing.

Suggestions for using sprays

It has been my experience that sprays of glyphosate (such as Roundup and other examples) may kill back the above-ground parts of nutsedge plants but do not provide significant effective control of tubers. Preemergence herbicides used to prevent weed seeds from establishing new plants are of little benefit because nutsedge plants arise primarily from tubers, not from sprouting seeds.

Several products are available on the market to control nutsedge. Repeat applications will be required for effective control. The addition of a surfactant helps the spray stick to and penetrate the waxy nutsedge leaves more effectively. Note that Sedgehammer Plus already contains a surfactant. Note that some products can take two weeks to provide visible symptoms, so be patient. 

Carefully read and follow all directions on the herbicide label. Product formulation and labels can change. The label is the final authority, including over comments made in this article.

Drought stress results in poor nutsedge-control results. Avoid applications of postemergence products to turf stressed by drought or other factors, making it more susceptible to herbicide damage.

Wiper applicators can be helpful

When applying an herbicide product around desirable plants that may be adversely affected, it is best to use a wiper-type applicator to help avoid contact with desirable plants. Wipers apply a small amount of the herbicide directly onto the weed’s foliage, which outcome significantly limits pesticide application rates, environmental concerns and damage to desirable plants nearby. If you’d like to build a simple, inexpensive weed wiper, I have instructions on my website that include product-ingredient names for controlling various types of weeds and trade-name examples.

Nutsedge, although a tough, formidable foe, is not invincible. With diligent, determined, consistent efforts, it can be managed in a home garden and landscape. So, I’ll leave you with these immortal words from the venerated coach Knute Rockne, as they are fitting for the task at hand: “When we get them on the run once, we’re going to keep ’em on the run! … and don’t forget men, today is the day we’re going to win! They can’t lick us, and that’s how it goes! … go in there and fight! Fight! Fight! Fight! Fight!” 

Almost Time to Start Those Flower Seeds

My catalog seed orders have arrived. I’m always eager to get a head start on the garden season, and must force myself to not start them too early. Each flower seed packet will provide a guideline of when to start seeds. This is usually something like “6-8 weeks prior to the last spring frost,” meaning you count backwards from the frost date to the correct time to sow your seeds. This is a simple concept, but I find that using a printed calendar gives me a visual confirmation that I struggle to obtain when using the calendar function on my mobile phone. The frost date varies from area to area and the germination period will vary from plant to plant. If you don’t know your last average last frost, call your local Extension office and ask. In my area of the country, last frost date is April 15 but I always factor in where Easter falls on the calendar. If Easter is “late,” I delay my seed starting by an extra week. This year it falls on April 20, while some years it may fall in March. It is preferable to delay by a week than to risk transplanting your cherished seedlings outdoors to have them stunted by a late cold snap.

The tools for successful seed starting include: clean containers, good seed-starting medium, quality seeds, and warmth. (The need for light normally comes after germination.) Most big box stores and garden supply stores sell seed-starting kits, a waterproof tray that holds six or eight inserts, segregated into four or six sections. A complete kit may include soil and a plastic snap-on lid or dome cover to create a humid environment. It is easy to recycle plastic trays from year to year (I reuse those from plants I purchased in the past) but it is imperative that the recycled trays, dividers, and covers are clean. Before reusing old containers, I soak them for 30 minutes in a five-gallon bucket of bleach water (nine parts water to one part bleach), then rinse well and dry in the sun.

You can purchase starter items individually from better quality nurseries and farm supply stores: “flats,” soil containers that fit inside the flats (typically 4-packs, 6-packs, but can also be 128 plugs or other sizes), and plastic snap-on lids to retain heat and moisture.

Look for bags of “seed starter mix.” This is a very fine, lightweight soil-like substance that allows seeds to emerge with minimum effort. Fill packs with pre-moistened starter mix. If you cannot find seed starter mix, try vermiculite as a substitute. If the planting medium seems to shed water rather than absorbing it, either use hot water or add a drop of dishwashing detergent to the water used for dampening the mix. I prefer the hot water method, and usually dump a couple of cups of hot water directly into the bag and wait about 30 minutes for it to absorb, shaking the bag a few times for even distribution. Pack the damp mix into the containers, plant seeds at the depth recommended on the package, mist lightly (I use a spray bottle) to ensure seeds get wet, and top with a dusting of dry starter mix. Add water to the flat/tray holding the 4-packs or 6-packs. It will wick up to the seeds without displacing them. This is called “bottom watering.” Top watering (sprinkling the top) can displace seeds or wash them too deep into the starter mix. Give seedlings enough water to keep them from drying out but don’t allow the medium to be so wet that it appears shiny. Too much water can cause seeds to rot, invites gnats, and offers an hospitable environment for fungus growth.

Start with high quality seeds. You can purchase new packages each year, or use leftovers from the prior year, as long as the seeds were stored in a cool, dark, dry place. Some seeds will last several years (tomatoes) while others get stale quickly and should be purchased fresh each year (lettuce, parsley). And a few plants are more successful when started directly in the ground (“in situ”) than from transplants. The seed packet will state “best started outdoors” for these.

A few seeds need light to germinate, while others need total darkness. These seeds must be exposed to light in order to germinate: African Violet, Ageratum, Artemesia, Begonia, Bells of Ireland, Browallia, Chinese Lanterns, Coleus, Coreopsis (Tickseed), Dusty Miller, Aquilegia (Columbine), Gaillardia, Geranium, Heuchera (Coral Bell), Impatiens, Lychnis (Lamb’s Ears), Nicotiana, Penstemon, Pentas, Petunia, Platycodon (Balloon flower),  Poppies, Portulaca, Primrose, Snapdragon.

The following seeds need darkness to germinate: ) Armeria, Calendula, Catharanthus (Periwinkle), Centaurea, Delphinium, Echinacea (Coneflower), Gazania, Nasturtium, Tithonia (Mexican Sunflower).  

African violet, petunia, and wax begonia have such tiny seeds that I prefer to purchase plants rather than start them myself.

Reusing starter trays and packs without sterilizing them may introduce pathogens that will kill off your precious seedlings. It is heartbreaking to see a flat of new seedlings succumb, overnight it seems, to “damping off.” This condition makes stems look like they have been pinched. Once the stem develops this thin, pinched-looking spot, there is no recovery. Remove the seedling and its soil as quickly as possible, to prevent fungal spores from spreading to healthy plants. Prevent damping off by using clean containers, avoiding overwatering, and providing good air circulation.

Certain seeds (zinnia is one) resent root disturbance so much that they are happiest when sown in peat pots rather than in plastic packs. Once the seedling has emerged, the entire pot is planted outdoors and it breaks down in the soil. I have read concerning reports about the dwindling supplies of natural peat, and last year I spotted a new type of “peat” pot that is manufactured from sawdust (of which there is NO shortage). I trialed them in my own seed starts and found them to be equal to peat in every way, so will continue to seek these out.

Peat-free starter pots for seedlings which resent root disturbance

Warm temperatures make seeds germinate faster. Soil heating mats are available online and in nurseries that sell seed starting supplies. These are designed to raise the soil temperature about ten degrees warmer than the surrounding air and are sealed to be waterproof. The mats are the same size as a typical seed flat. The downside of using these germination aids is that they require electricity.

An example of electric seed tray heat mat offered by Amazon. There are many brands available.

Plastic dome covers retain heat and humidity. Once seeds have sprouted, remove any soil warming devices and plastic covers. Cooler temperatures and plenty of light will encourage stocky, strong seedlings. Good air circulation helps keep seedlings healthy. I utilize an old box fan to keep the air moving but do not direct the breeze directly at the seed flats.

Filled seed flat covered with plastic dome

A plastic hat for the seed flat allows light to pass through but slows evaporation, keeping the soil damp.

Once seeds have germinated, they need plenty of light to grow and thrive. This can be particularly challenging if you are attempting to start seeds indoors near a sunny window. Insufficient light will result in spindly, weak plants. If weather is cloudy for a long stretch of days, new seedlings will elongate and weaken. If cloudy weather is in the extended forecast, you may need to add artificial light to keep seedlings strong and happy. When I first started gardening, grow lights were florescent. Now, LED lights are preferred because they emit high quality, intense light and use much less energy because they don’t produce heat.

Tall, skinny seedlings

These seedlings are growing tall and skinny - a clear sign that they need more light than they are currently receiving.

Dead seedling with brown stem

This poor seedling has suffered “damping off” from a fungal attack. The problem was likely caused by too wet a soil, as evident from the sheen of dampness on the starter mix.

Gradually acclimate seedlings to the harsh outdoors over a period of 7-10 days. This process is called “hardening off.”  Place seed flats outdoors in a protected area (away from winds and out of full sunlight) for an hour or two each day, gradually lengthening the time. If a day is especially blustery or unseasonably cool, skip it. Once temperatures are warm and threat of frosts and freezes are past, carefully transplant seedlings to their new homes. Handle them by leaves, not stems. A torn leaf does not impact future growth, but a damaged stem usually results in death. Below are my two favorite tools for lifting seedlings from starter packs, both moved from my kitchen: a square tipped sugar spoon, and an angled icing knife.

A sugar spoon is the light size to lift a seedling from a 4-pack seed tray and the angled icing knife is narrow enough to use when lifting from a smaller plug tray.

Starting your own seeds offers the benefit of many more choices than are available from transplants at local nurseries. And it’s fun!

Flamboyant Pileated Woodpeckers

Our rural location in upstate South Carolina is a bird mecca. We host a variety of bird species, large to small. One of my favorites is the pileated woodpecker, which are common across southeastern forests. Last summer, I tried repeatedly to capture a photo of these beautiful birds. We have at least six living in the woods near our home. They became accustomed to my presence in the front gardens, and would swirl and swoop around as if they were showing off their pretty black, white, and red plumage. Every time I popped the lens cover off the camera, however, they disappeared. When the lens cover went back into place, they would reappear. It was almost as if they were messing with me. I finally gave up, contented to see them at a distance, hear their distinctive calls, and witness their impressive excavation skills.

The first time I saw one of their squarish excavations, I did not realize what I was seeing. Later, I found that the tree was inhabited by large black ants, a favorite snack of the pileated woodpecker. Still later, I witnessed one going after the insects inside the bark of a tree stump near the driveway. The noise alone was impressive, but the shower of wood debris sent all directions was awesome.

Pileated woodpecker are big birds, almost as large as crows. Their heads are topped by neat red crests that make them easily distinguishable. The word pileated means capped. You can see large patches of white on their wings when they fly. The head crest on juveniles is smaller and less pointed, almost like a bird version of mohawk haircut.

As long as dead trees (“snags”) in our woodlands are not endangering buildings, driveways, or walking paths, we allow them to stand. These snags offer an ideal bird home. Woodpeckers seem to prefer tall trees over shorter ones. They raise one brood in a tree cavity, then abandon it and create a new cavity for the next brood. These excavated holes are used by other birds and small mammals. An average pileated brood consists of four eggs. Hatchlings fledge in about a month.

Pileated woodpeckers mate for life, but males and their females roost in separate cavities at night, even if they use the same tree. They are primarily insect-eaters but may also visit feeders, especially if suet is offered. They also eat fruits, nut, berries, and beetle grubs.

In late November, I misidentified a small bird that was visiting my prized Styrax japonica tree. I thought it was a juvenile pileated woodpecker, but when I approached, I realized that it was a redbellied woodpecker systematically destroying the tree’s bark. I kept shooing it away but this fella was not to be deterred. I eventually wrapped the tree trunk in hardware cloth, which he ignored. I then swaddled the entire tree in a garden mesh fabric. It looked awful but I was willing to do what had to be done to avoid the trunk being completely girdled and the tree killed. Aside: why, oh why, is a redbellied woodpecker so named, when it has a red head but not a red belly?

Pileated woodpeckers do not migrate. And I am happy to report that their populations are growing, a remarkable feat considering the housing growth in America taking over woodlands. Banded birds have been studied for their longevity. They have a lifespan of 12 years or so.

A male pileated woodpecker. The cheek stripe on a female is black instead of red.

Expanding The Gardeners' Vocabulary

I added a new word to my gardening vocabulary this week: thermotropism. In simple words, this is a plant’s reaction to temperature changes. Rhododendron exhibits one of the most obvious reactions to cold weather. When the weather turns frigid, Rhododendron leaves curl inward. It may look like the plant is suffering from drought, but instead it is reducing the surface area exposed to cold to keep internal moisture from evaporating.

While I was researching thermotropism, I discovered an entire family of -isms in the horticulture world. Phototropism is when a plant moves in reaction to light (sun). I’m sure you have seen in your own gardens how sunflowers turn their heads to the east to catch the morning sun, then slowly turn toward the west as afternoon arrives. Foxgloves and daffodils do the same.

Thigmotropism is when a plant encounters a solid surface and reacts to it – like a morning glory curling around a trellis. A reaction to the presence of chemicals is chemotropism. Think of the way roots move towards areas of higher soil fertility. A plant’s reaction to gravity is called geotropism or gravitropism. Movement in search of water is hydrotropism. And some plants react to touch. The tickle of insect legs will cause a Venus Flytrap to snap closed around its next meal.

The southeast is predicted to experience a serious winter storm later this week, the first measurable snowfall in my town since 2022. It might be an insignificant event in the opinion of my friends that moved from Michigan, Minneapolis, and South Dakota. For this SC native, anything more than an inch of snowfall can rightfully be called a blizzard. So, I’m going to practice thermotropism, and wrap myself into a down duvet like a human taco. Friends, stay safe and warm!

Thirsty? No - COLD! This Rhododendron has curled its leaves as self-protection..

Photo By Nicholas A. Tonelli - Flickr: Nature's Thermometers, CC BY 2.0, https://commons.wikimedia.org/w/index.php?curid=24186333

Chindo Viburnum for Privacy Hedge

When cold weather arrives, I retreat into my shell (down vest) like a threatened turtle. There isn’t much to gladden the heart of this heat-loving gardener. Deciduous plants have dropped their leaves, perennials have passed into dormancy, and annual flowers are long gone. The refreshing appearance of evergreen trees and shrubs make the landscape tolerable. Needled evergreens can be damaged by ice. Limbs of broadleaf evergreens like Magnolia grandiflora break under snow loads. Harsh winds punish palms and conifers. Let me recommend an evergreen that seems to tolerate wind, ice, and snow without damage: Viburnum awabuki ‘Chindo.’

Before I met ‘Chindo,’ I thought of all Viburnums as smallish, deciduous shrubs. A few are known for fragrant flowers or colorful fruit. Others have especially nice fall color. The Chinese Snowball Bush is popular for its large, round white flowers in spring, resembling white mophead Hydrangea flowers.

Chindo Viburnum is an evergreen, low-maintenance shrub that will reach heights up to 20 feet and widths up to 15 feet. Plants can be kept smaller with annual pruning. Somewhat irregular in youth, Chindo matures to a pyramidal shape. It is cold hardy in zones 7b-9b. It will grow in a wide range of soil types and acidity. Chindo prefers part shade to full sun. It looks best when shaded from direct sun at the hottest part of the day. Established plants are moderately drought resistant. The thick, dark green leaves are so shiny they look polished. Plants grow fast – one to two feet per year, making it a good choice for blocking unsavory views.

All resources say that Chindo, introduced by J.C.Raulston, is known for its heavy set of red fruit clusters that follow white flowers which appear in early summer. I had a grouping of four plants, three of which were obtained as rooted cuttings from the fourth. I did not experience heavy berry set. In fact, I don’t recall any flowering. This probably means that my plants needed an outside pollinator instead of same-plant clones, and perhaps that I grew them in too shady an area. Even without flowers or berries, it is on my favorites list for its healthy appearance and low maintenance needs. Bonus: Chindo is rarely browsed by deer.

Select Chindo Viburnum for a privacy hedge, as an alternative to Magnolia, Tea Olive, Holly, or Arborvitae.

A bit gawky in youth, shown here, this Chindo Viburnum matured to a lovely pyramidal shape.